


How to Replace a Bayonet Fuse on a Padmount Transformer (Step-by-Step)
Step-by-step instructions for replacing a bayonet fuse in a padmount transformer. Includes tools, safety procedures, and installation steps.
How To's
Bayonet fuses are an important part of padmount transformer protection. If the transformer has overcurrent or overheats, the internal element of the fuse will melt, and the fuse will blow. This will break the electrical circuit, isolating the transformer and keeping any damage from spreading to other equipment.
When a bayonet fuse blows, the fuse link or in some cases the entire cartridge or holder assembly must be replaced. In this article, we’ll walk through seven steps to removing and replacing the fuse in a 23 or 38 kV bayonet fuse holder.
Required Tools
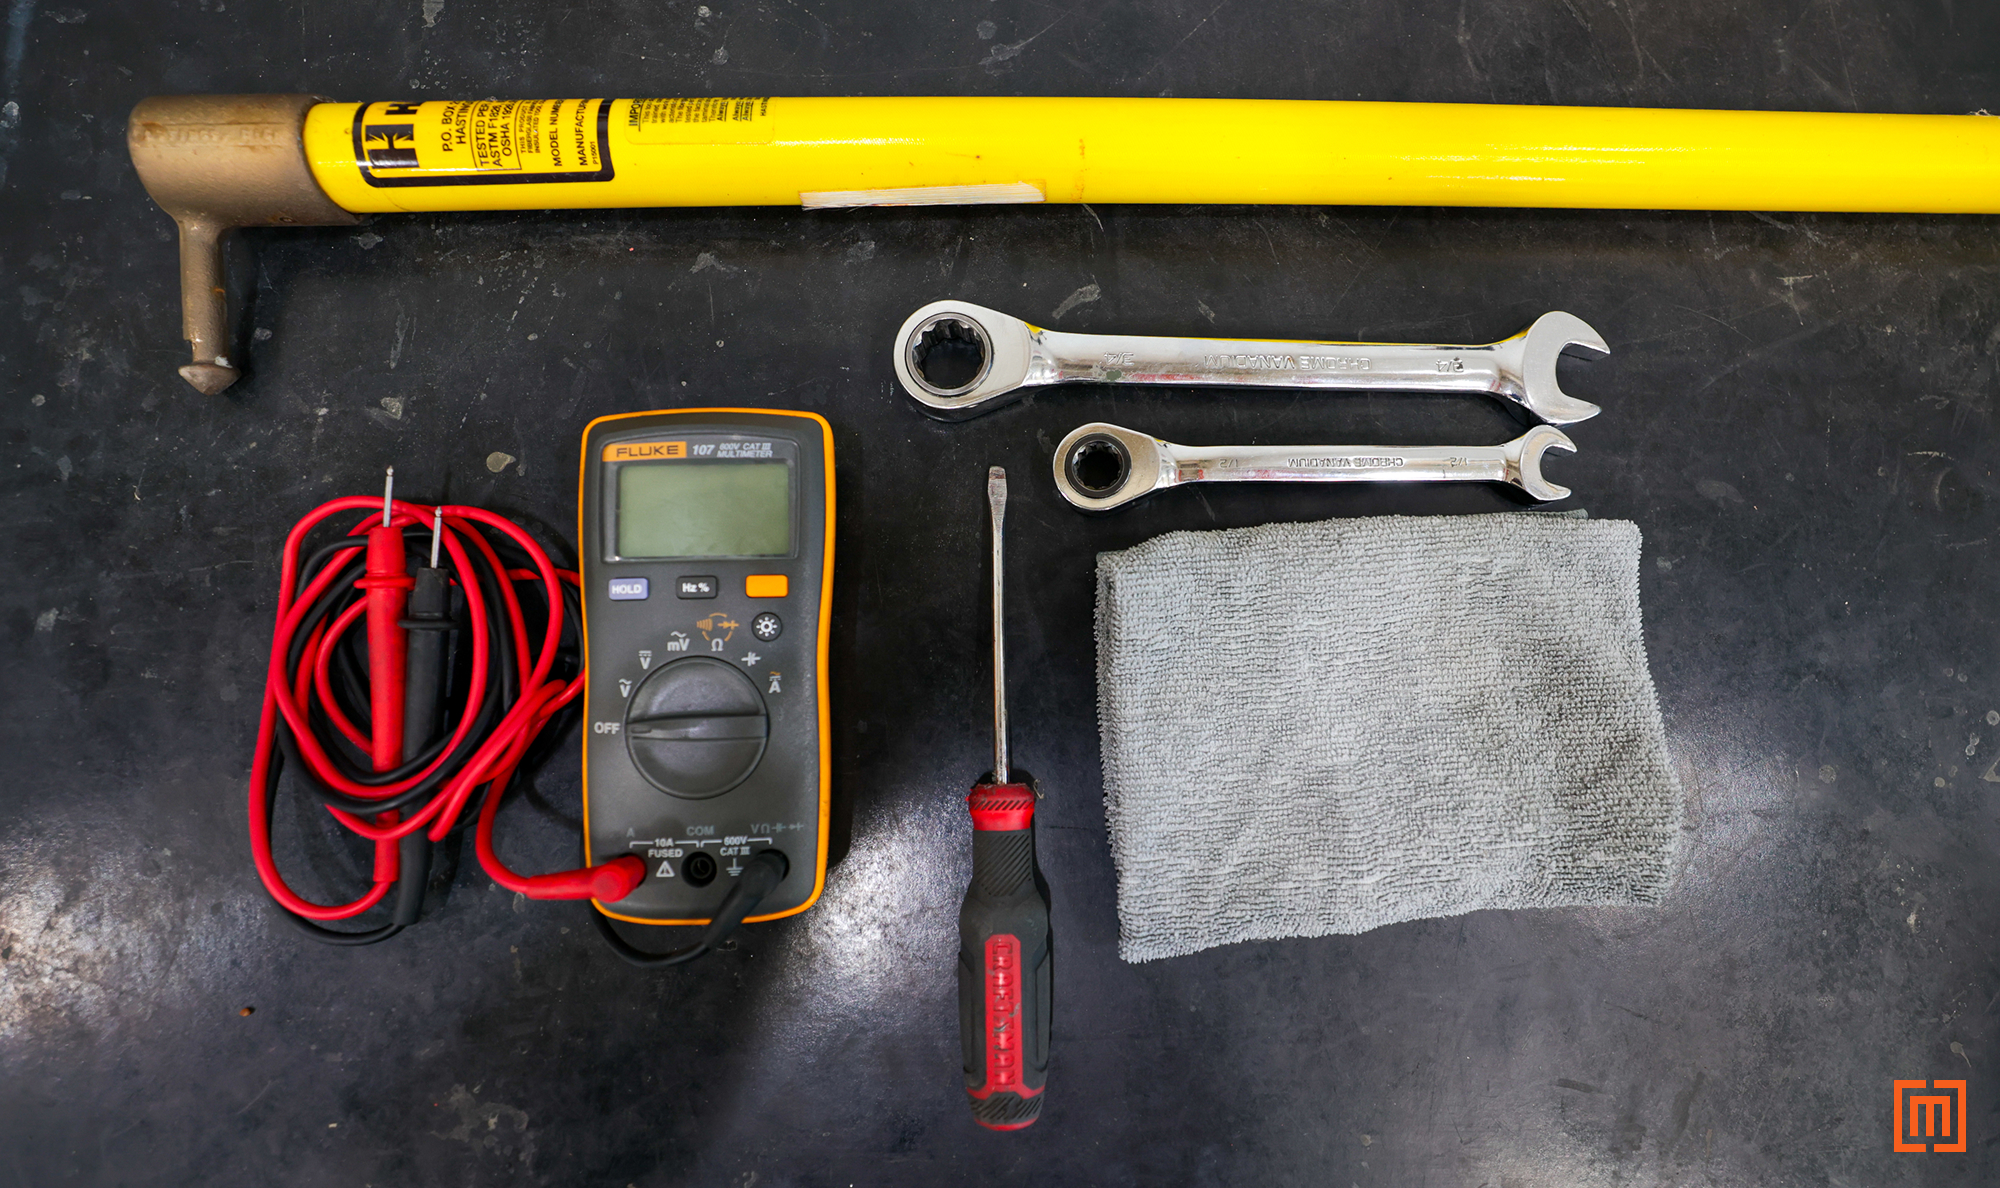
Here are the tools you’ll need for this process:
- Hotstick
- Multimeter
- ¾” and ½” adjustable wrenches
- Small flathead screwdriver
- Cleaning cloths
- Personal Protective Equipment (PPE)
Important Safety Notice
One note before we get started.
This article is a general guide for removing and replacing typical bayonet fuses. Always follow your specific equipment's installation manual and all locally approved safety practices. The bayonet fuse should only be serviced by technicians trained in high-voltage safe operating procedures.
1. Relieve the Tank Pressure.
Before removing the bayonet fuse, relieve the transformer tank pressure. If you skip this step, hot oil can spray out of the transformer while removing the fuse. Additionally, the fuse assembly itself can shoot out of the tank.
Use a hotstick to pull the pressure relief valve open and wait for the pressure gauge to reach zero. Keep the valve open for 30 seconds after the sound of escaping air stops.
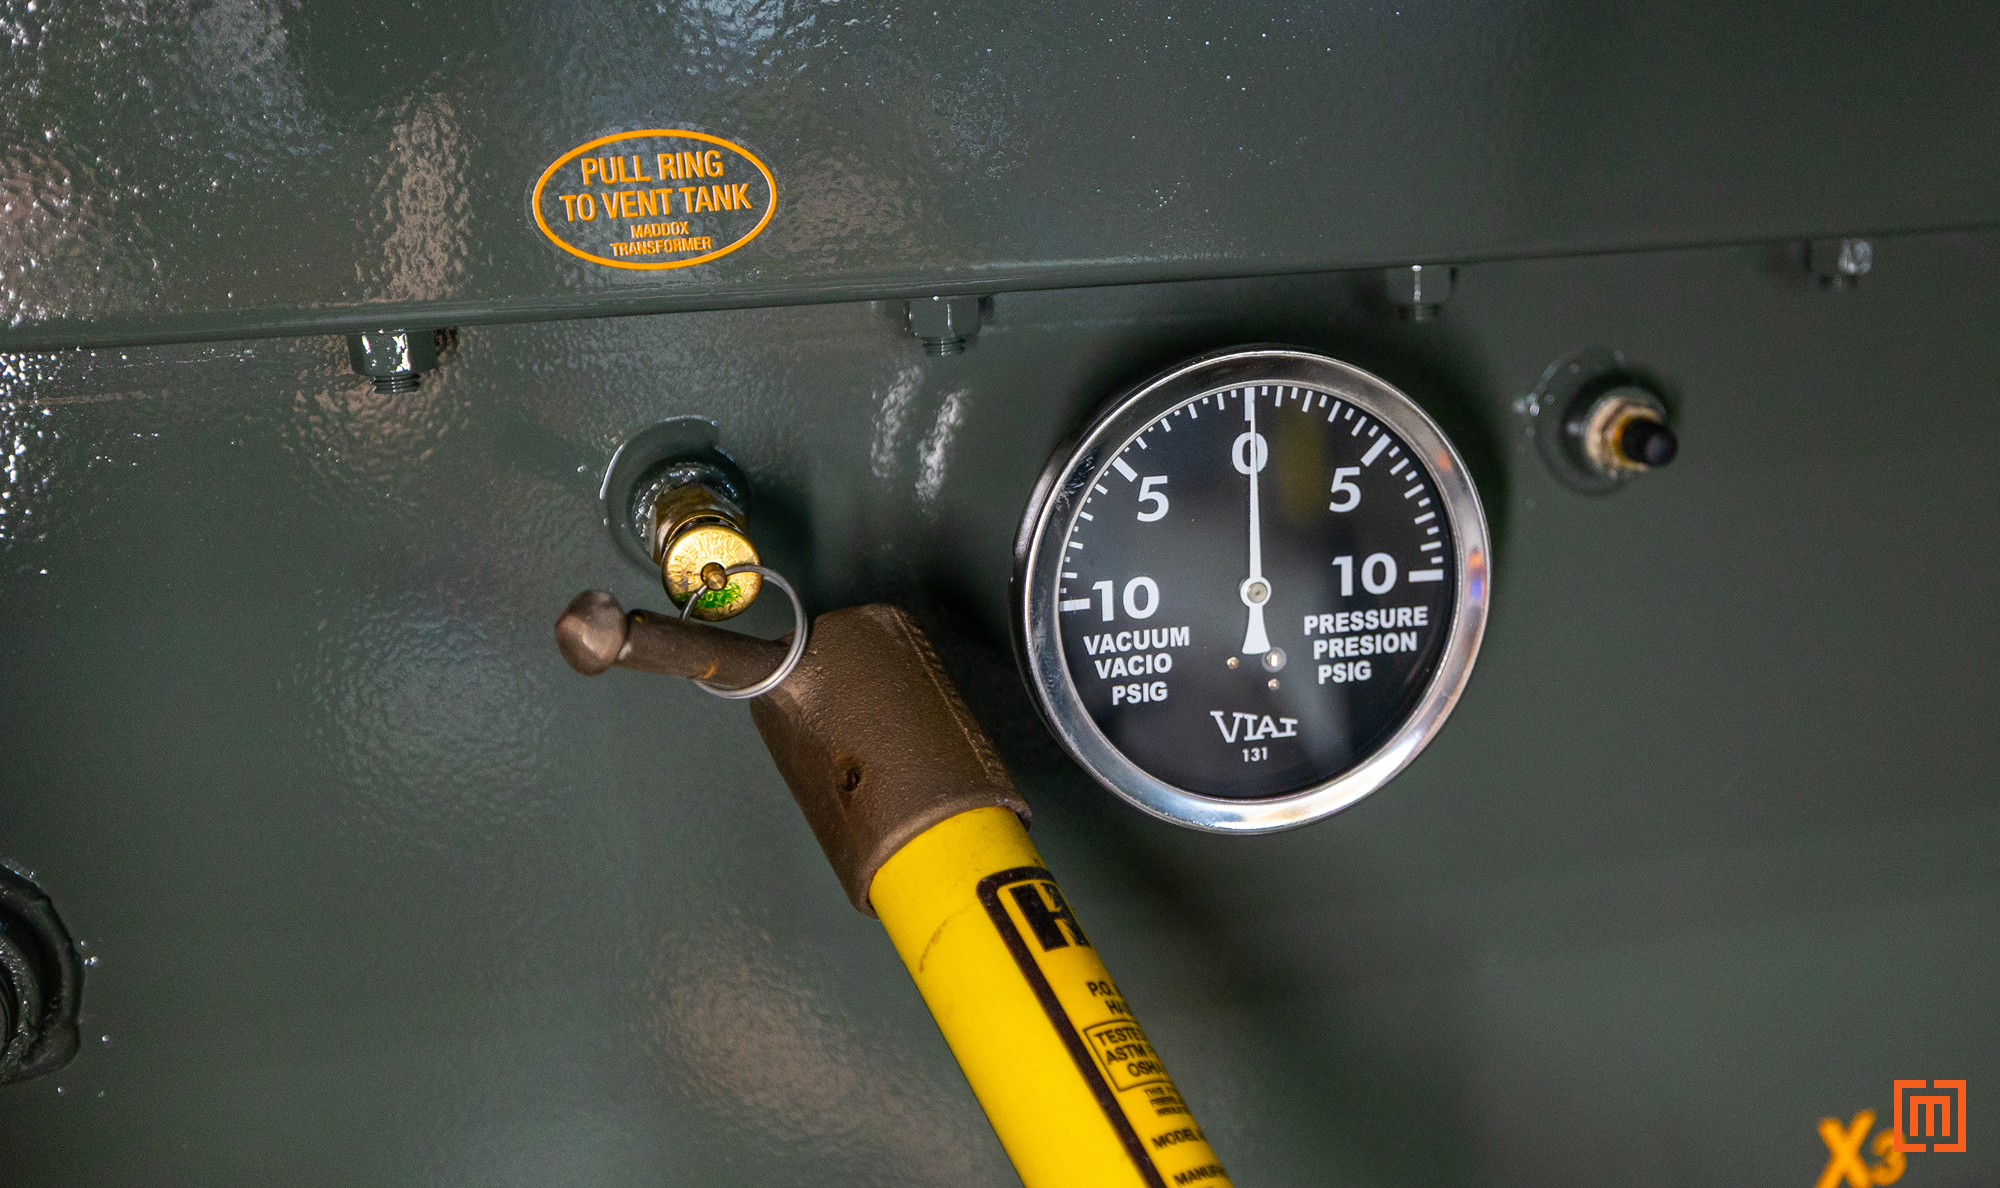
Close the valve, wait 30 seconds, and then pull it open again for an additional 5 seconds. This will make sure any residual pressure is gone.
Be sure to refer to the transformer manufacturer’s recommended process for handling tank pressure.
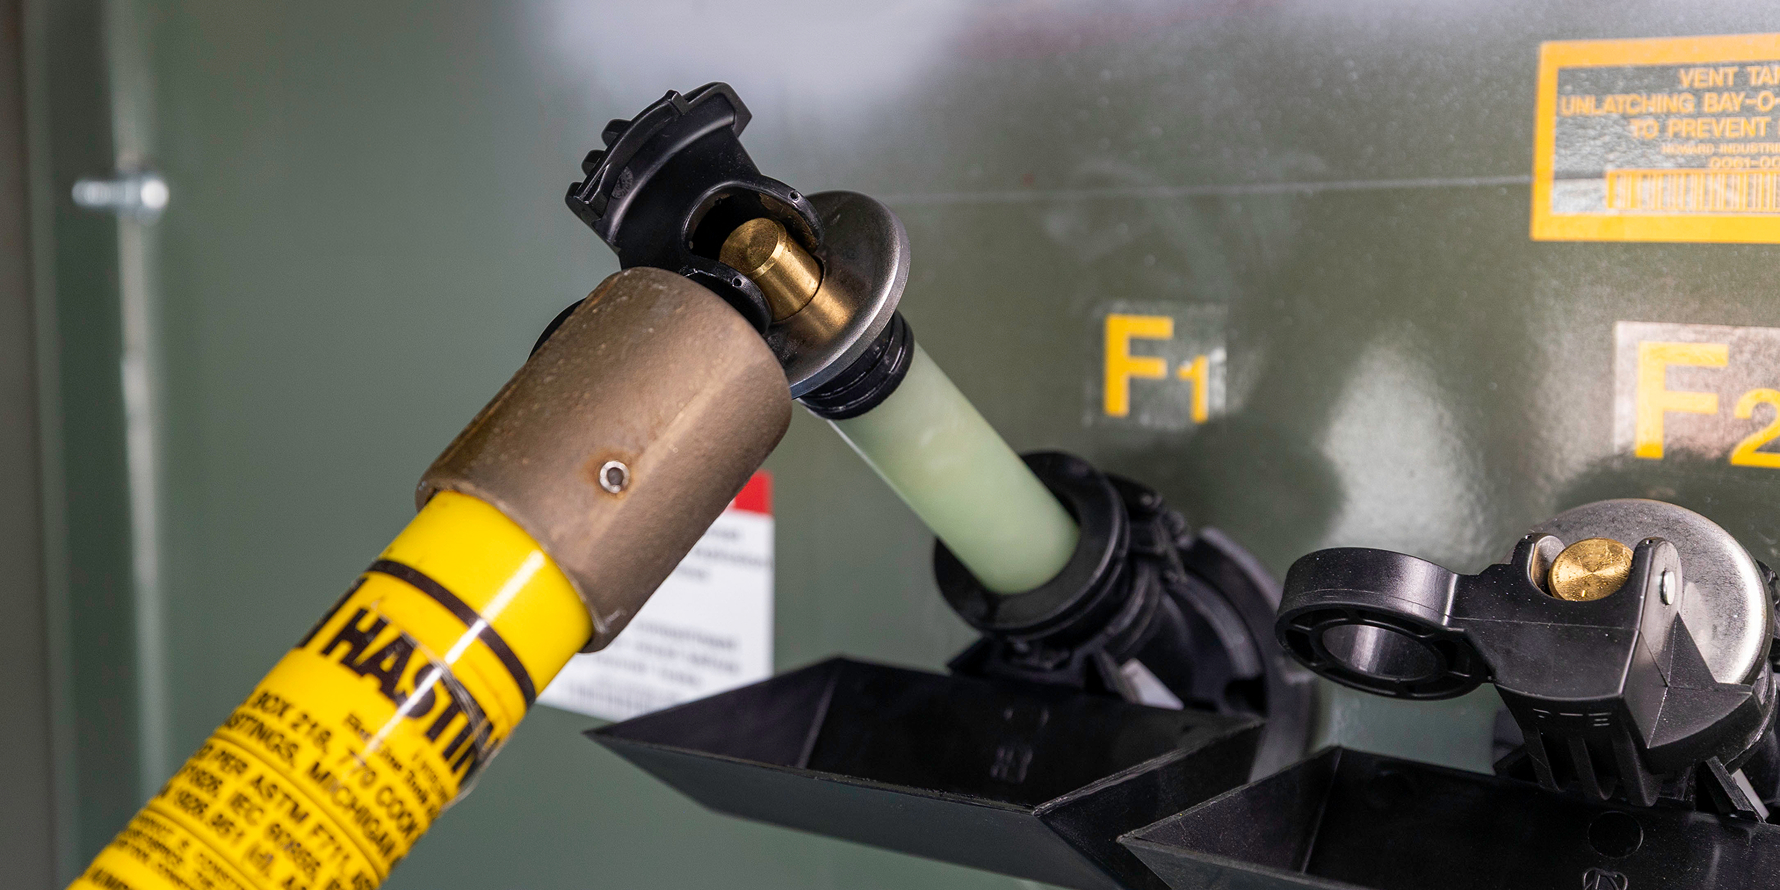
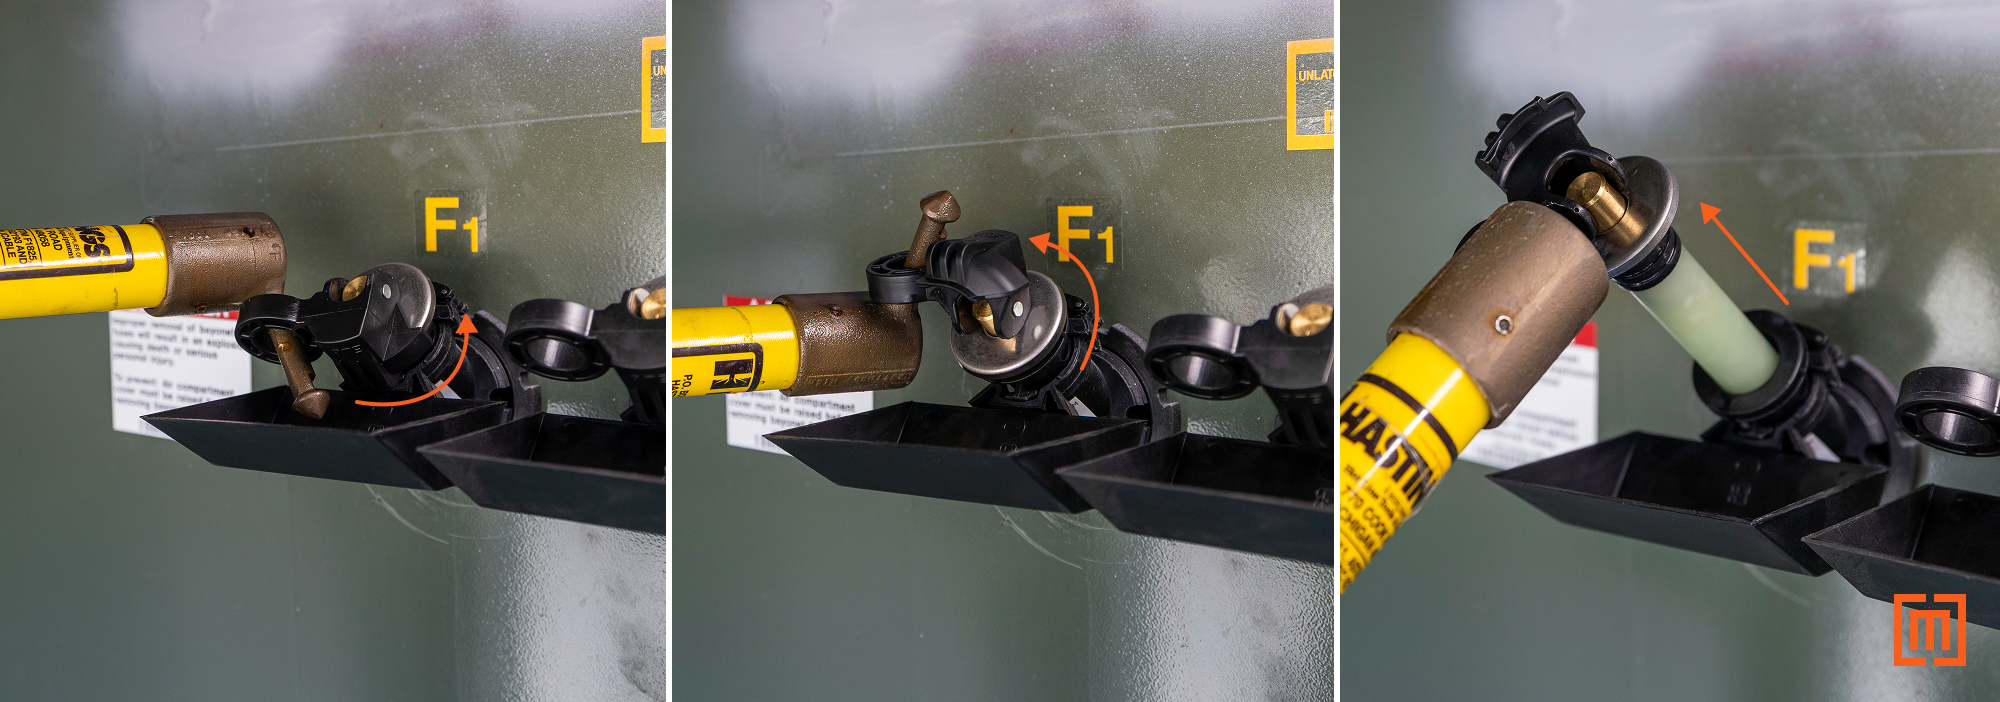
2. Withdraw the Fuse Holder.
Next, attach your hotstick to the fuse holder's eye and twist it 90° to unlock the holder and break the seal. In a rapid, continuous motion, draw the fuse holder out 6-8”. Doing this quickly and all at once is critical to breaking the load without arcing. If you pull out the fuse holder too slowly, it could cause arcing, transformer damage, or a fire.
Wait several seconds to allow the dielectric fluid to drain back into the tank, then slowly remove the fuse the rest of the way.
If your transformer has a metal or plastic drip guard, rest the holder on the guard for 30 to 60 seconds. This will minimize the amount of oil that could spill on the bushings.
Even if only one fuse appears to have blown, it is generally recommended to replace all bayonet fuses during this process.
3. Inspect and Test the Fuse.
Once the fuse holder is out, wipe off any excess oil using a cleaning cloth. Do not set the holder on the ground. Dirt or debris can contaminate the oil when the holder is reinstalled inside the tank.
.jpg)
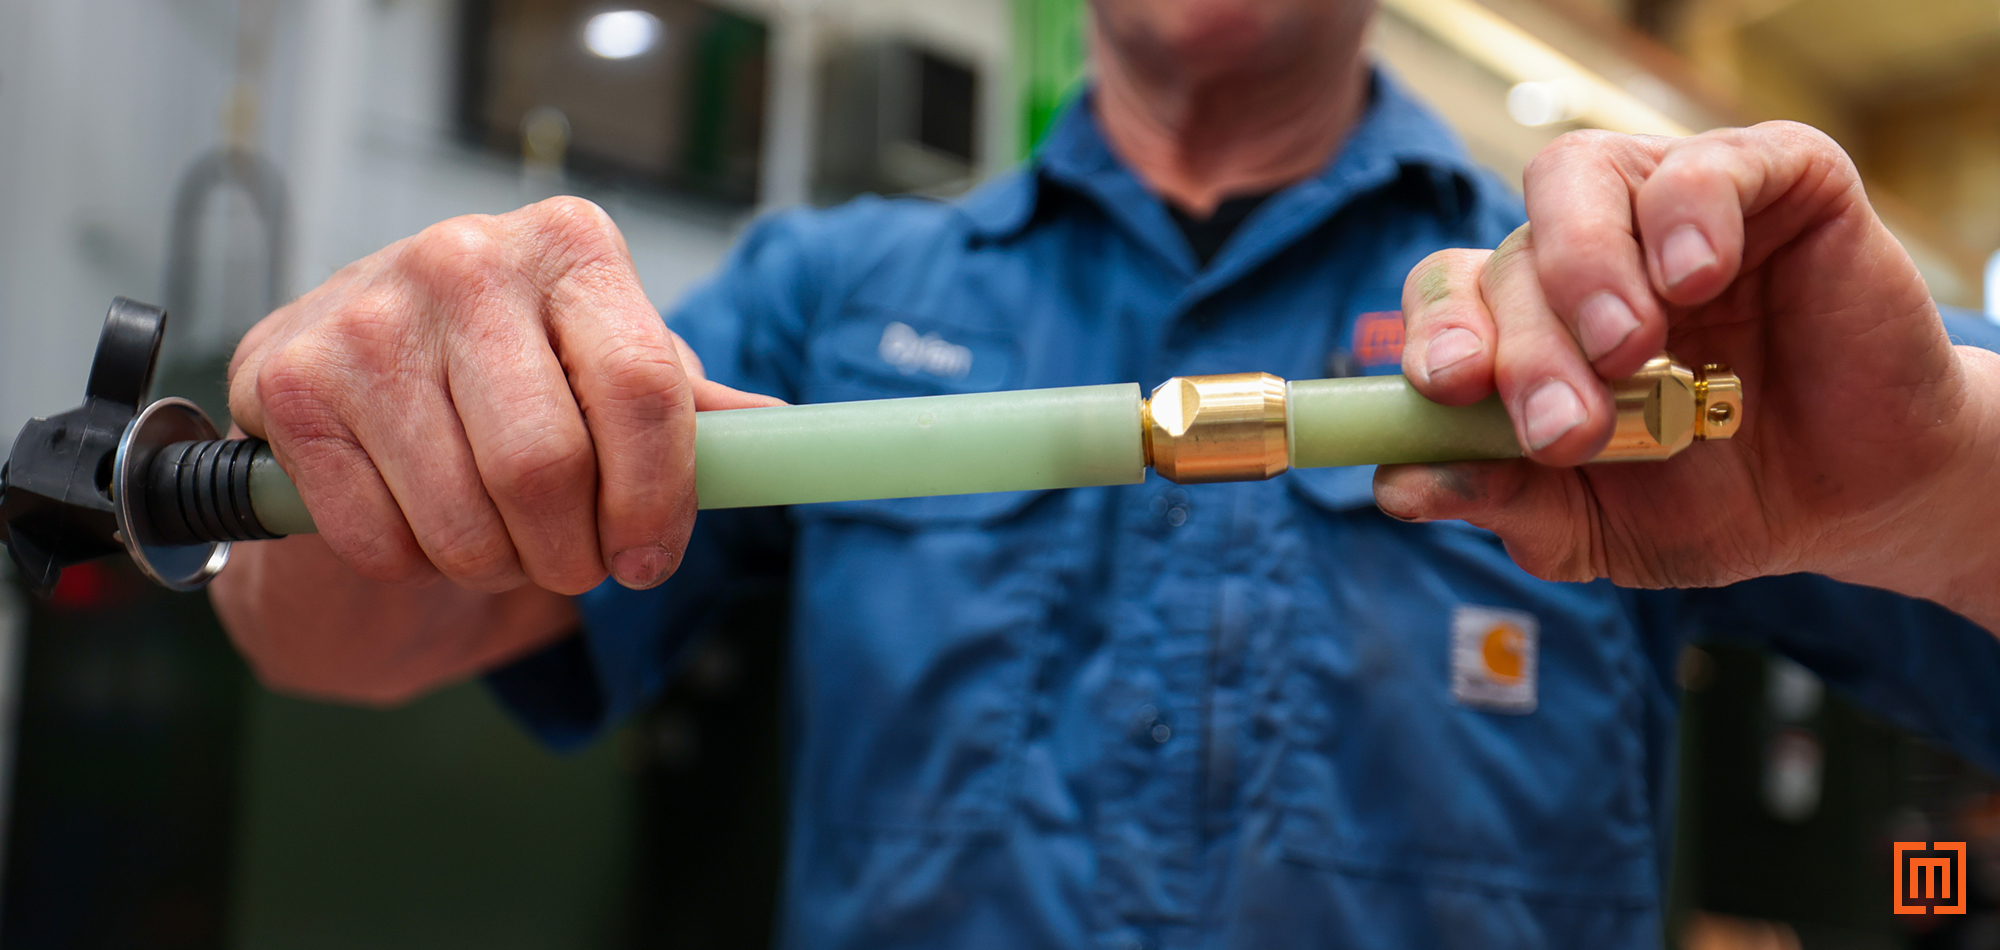
Next, use a multimeter to test for continuity across the brass ends of the fuse. If the meter does not beep or show continuity, the fuse is blown.
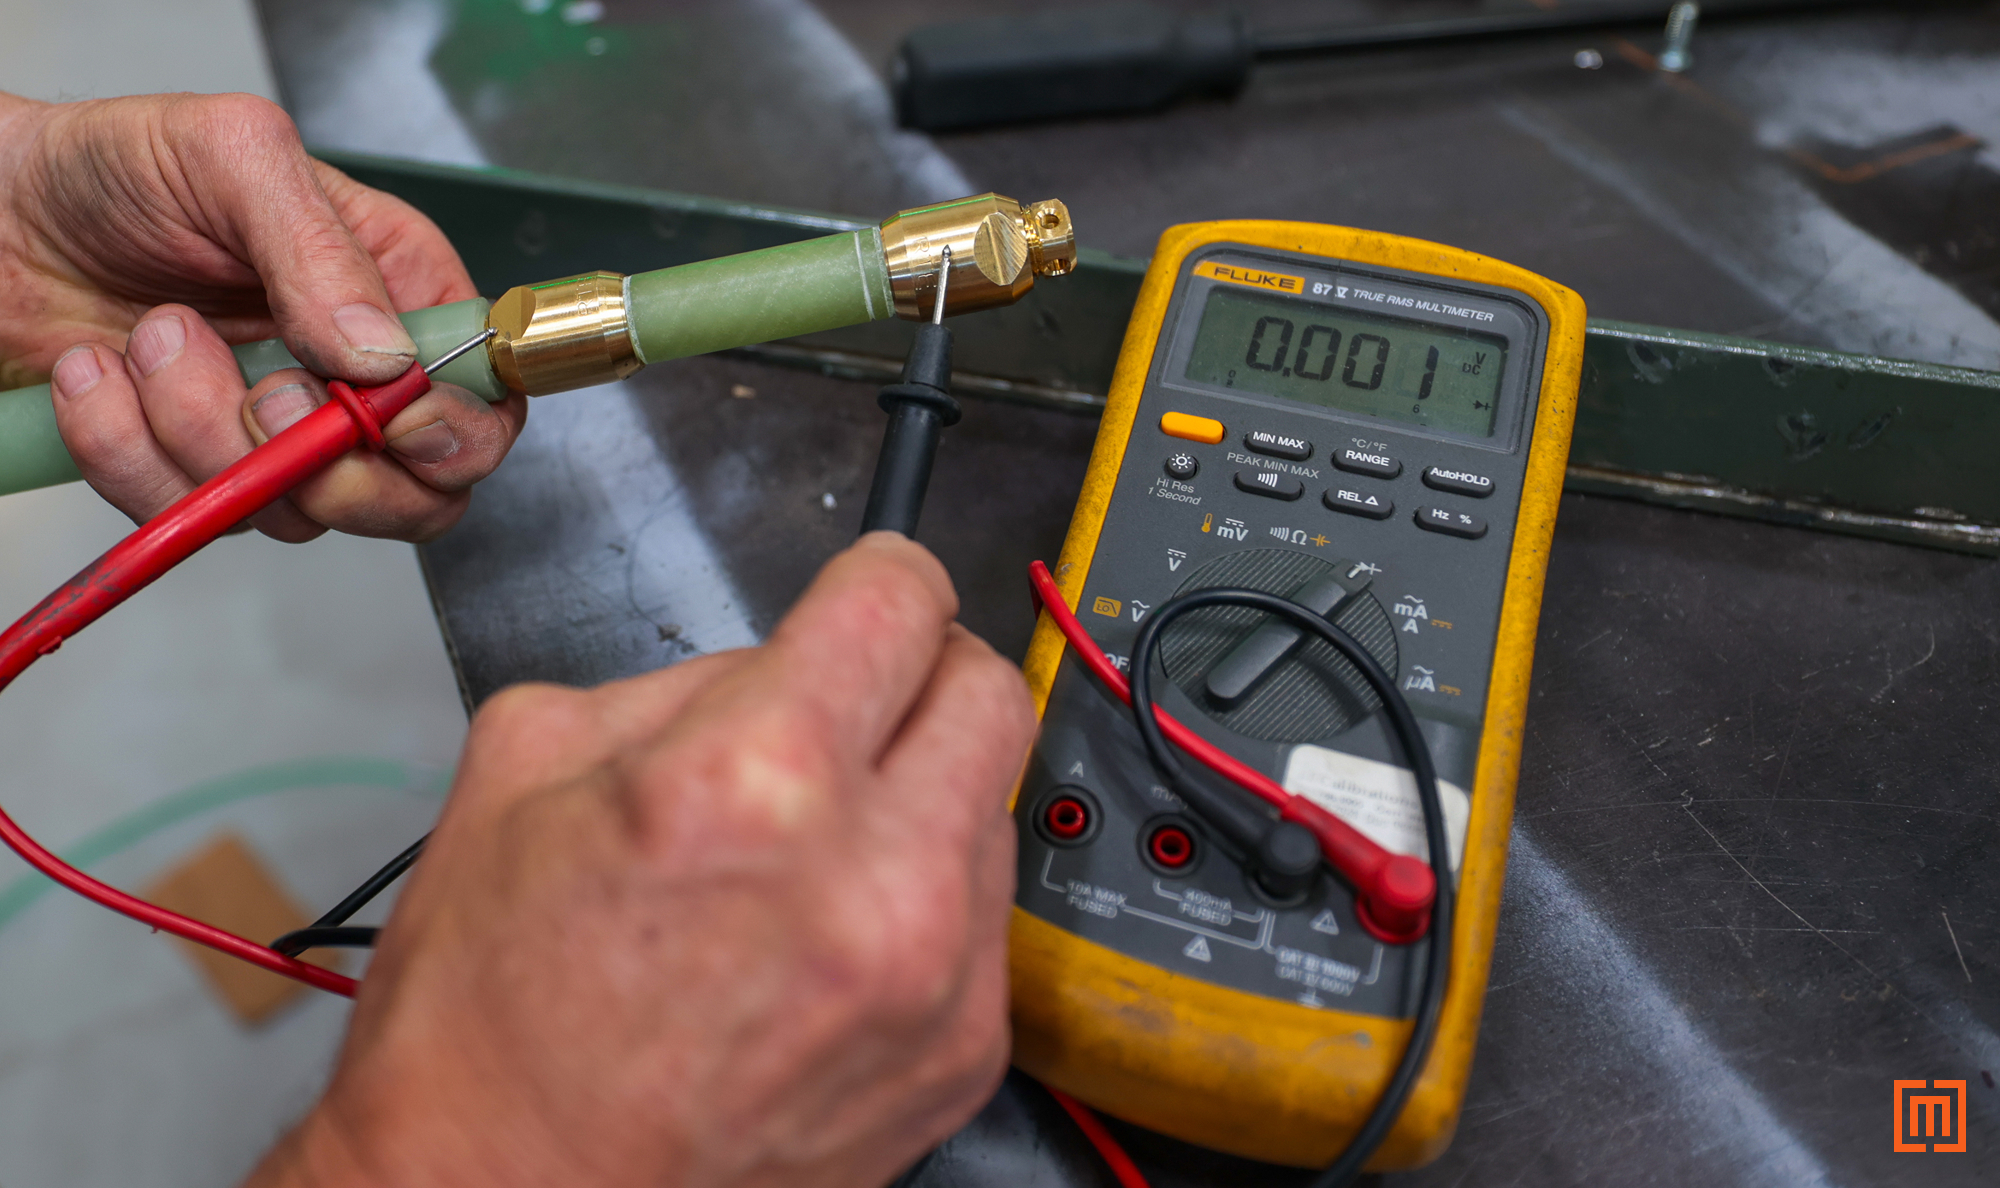
Also, visually inspect the fuse. A blown fuse will typically have spread tabs at the end, while a new fuse has perfectly straight metal tabs.
Next, use a ¾” wrench to remove the fuse cartridge. Inspect the cartridge itself. If there’s severe erosion, pitting on the brass, or burning on the insulation longer than ½”, the entire cartridge has to be replaced.
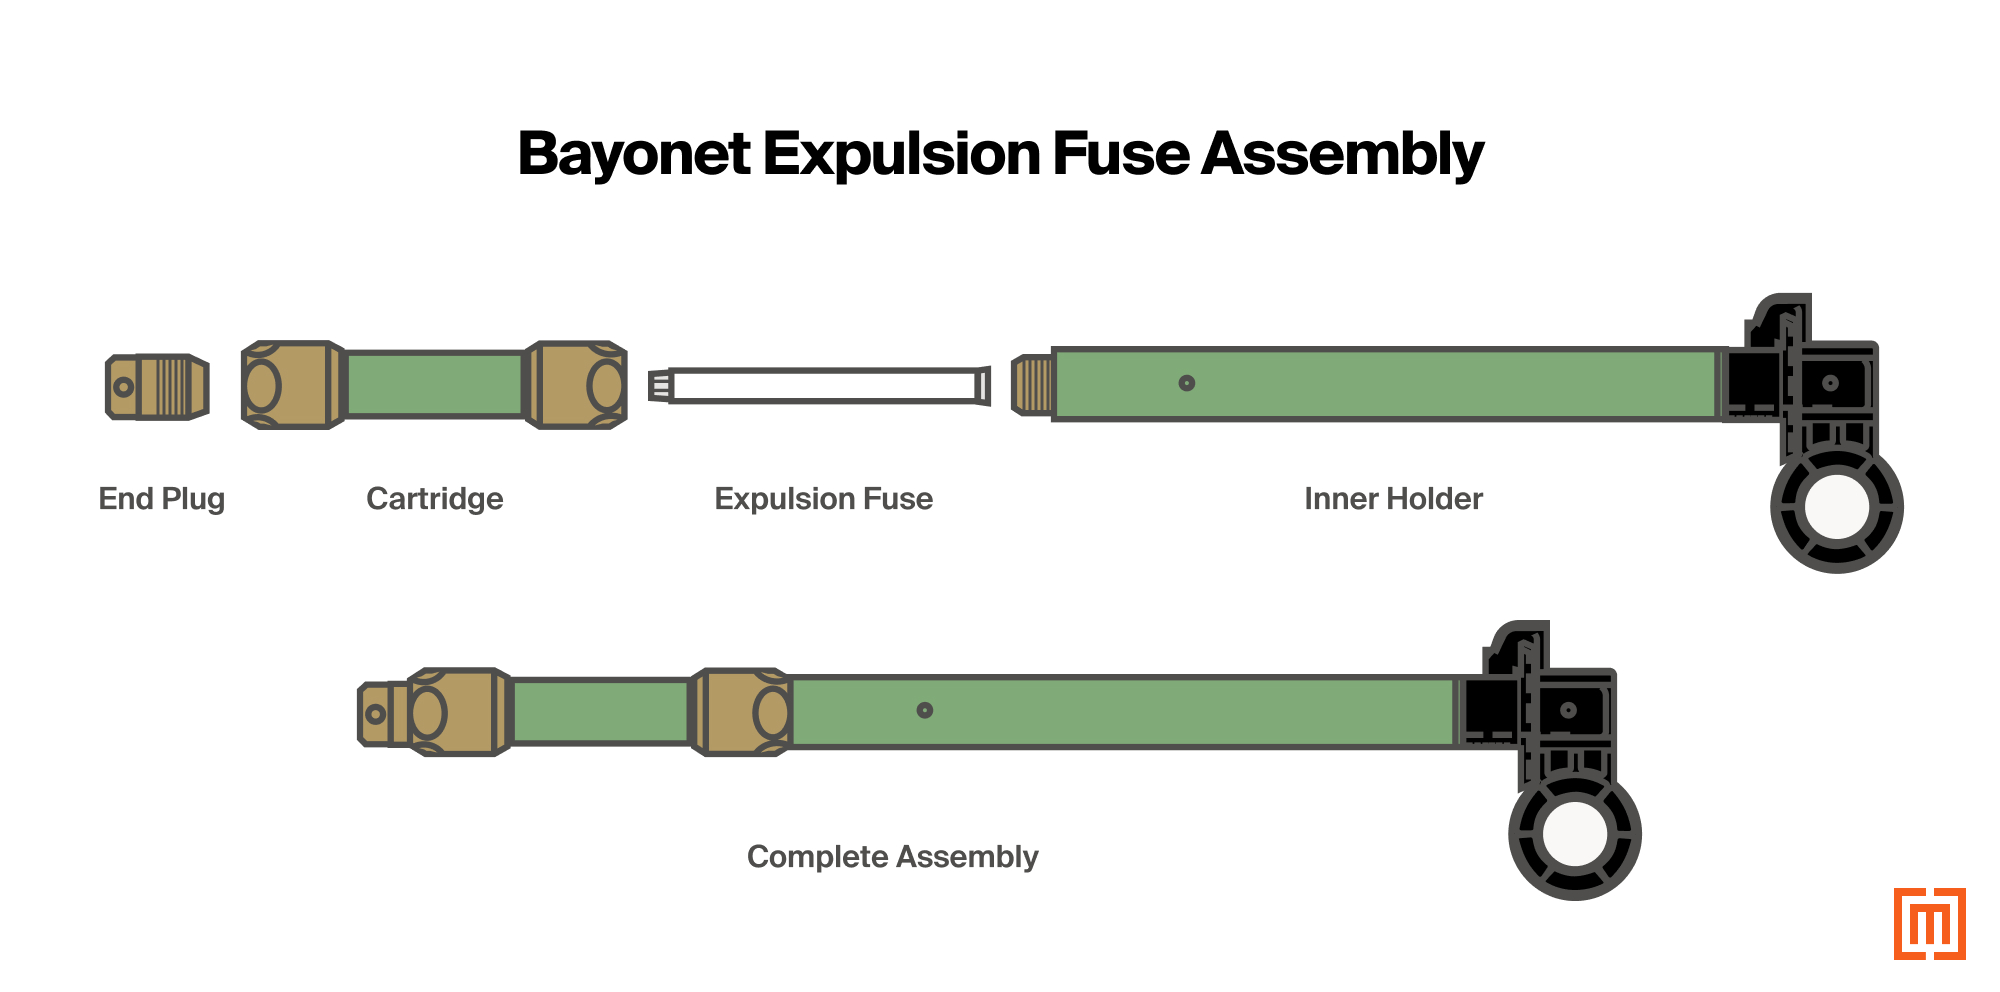
4. Replace the Fuse Link.
Using ¾” and ½” wrenches, remove the brass cap (the end plug).
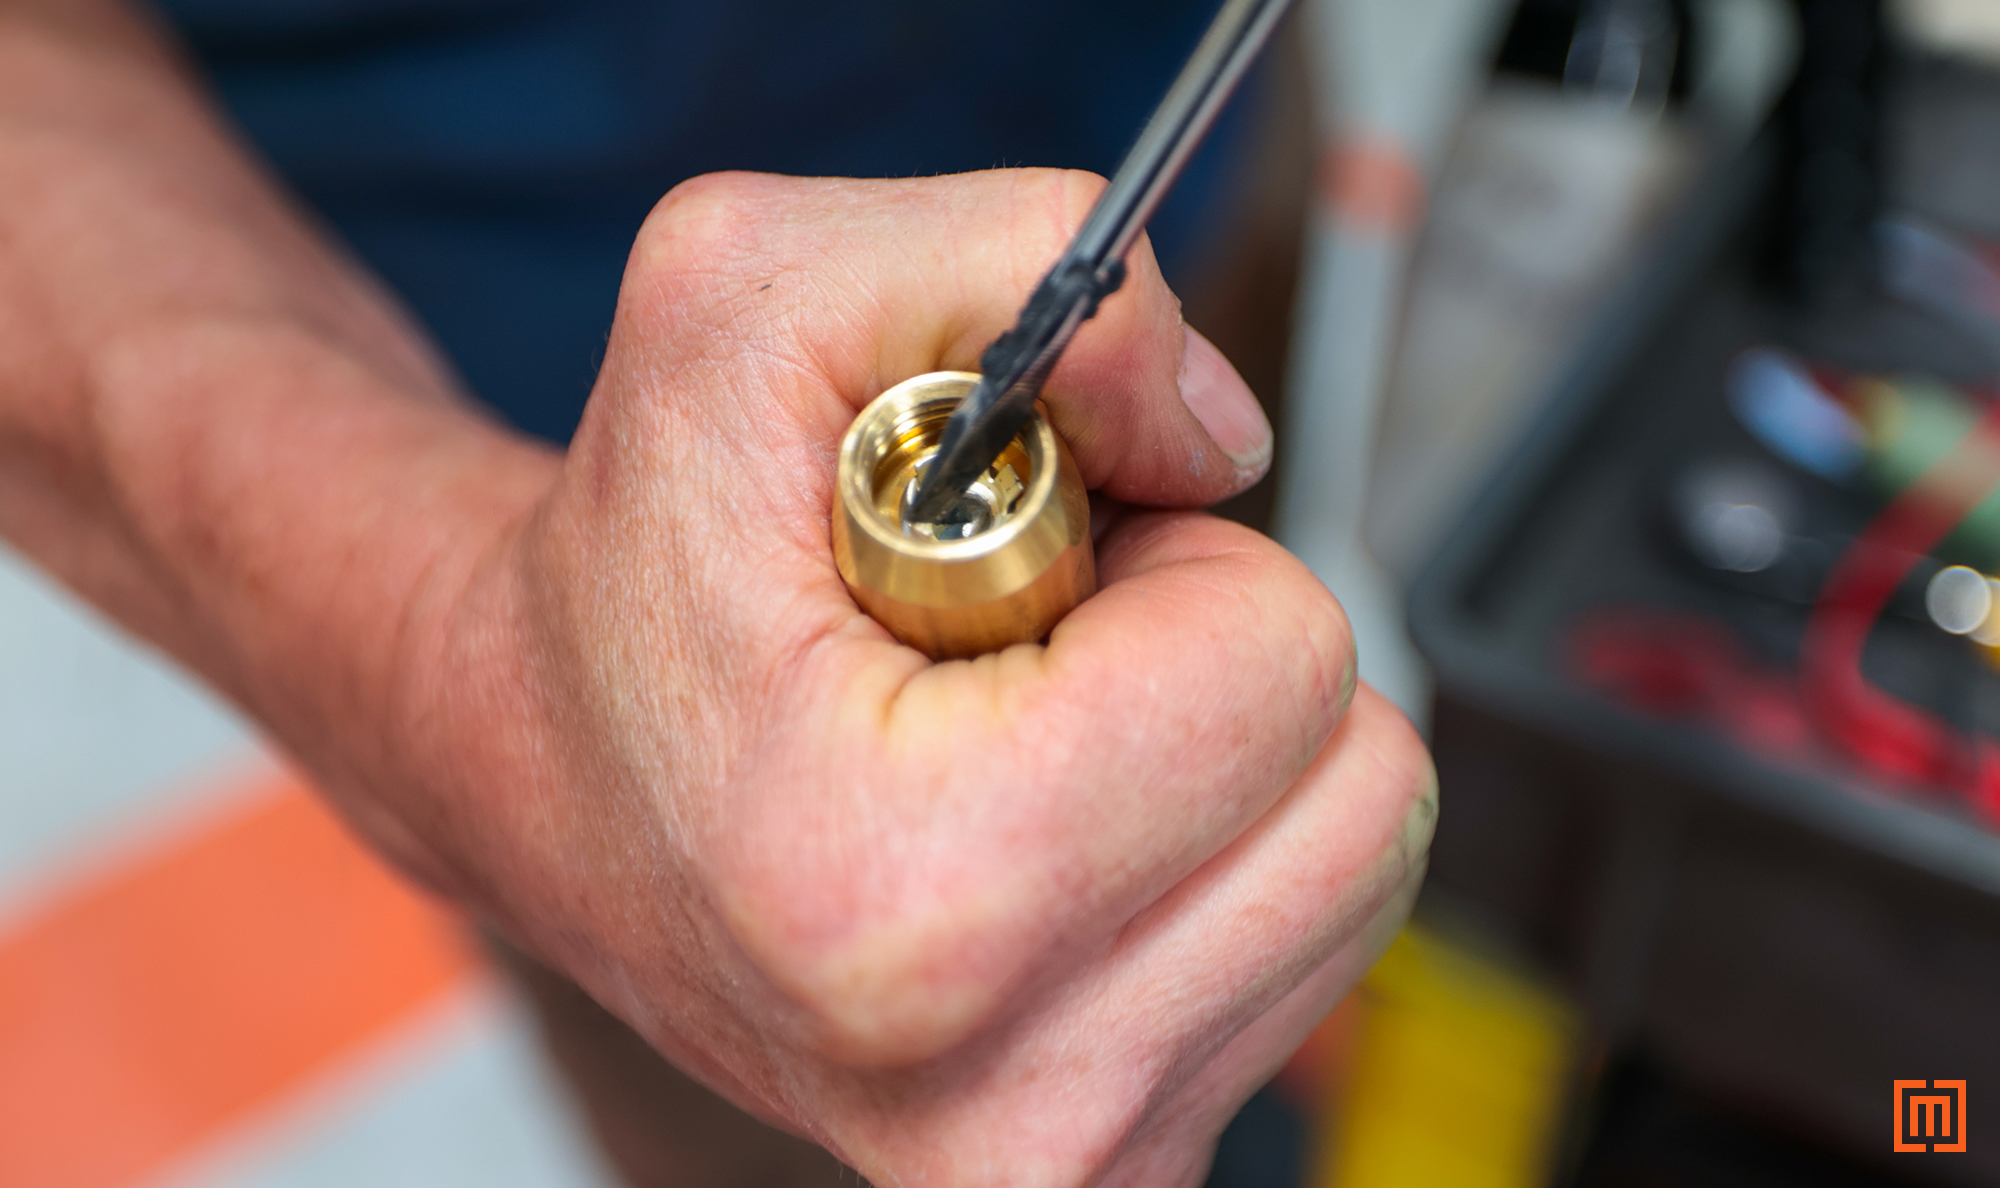
Use a small screwdriver to straighten the "tulip tip" end of the old fuse link and push it out of the cartridge.
Should I replace the fuse link or the entire cartridge?
In most applications, you’ll only need to remove and replace the internal fuse link.
However, if you notice any of the following, you should consider replacing the entire fuse cartridge.
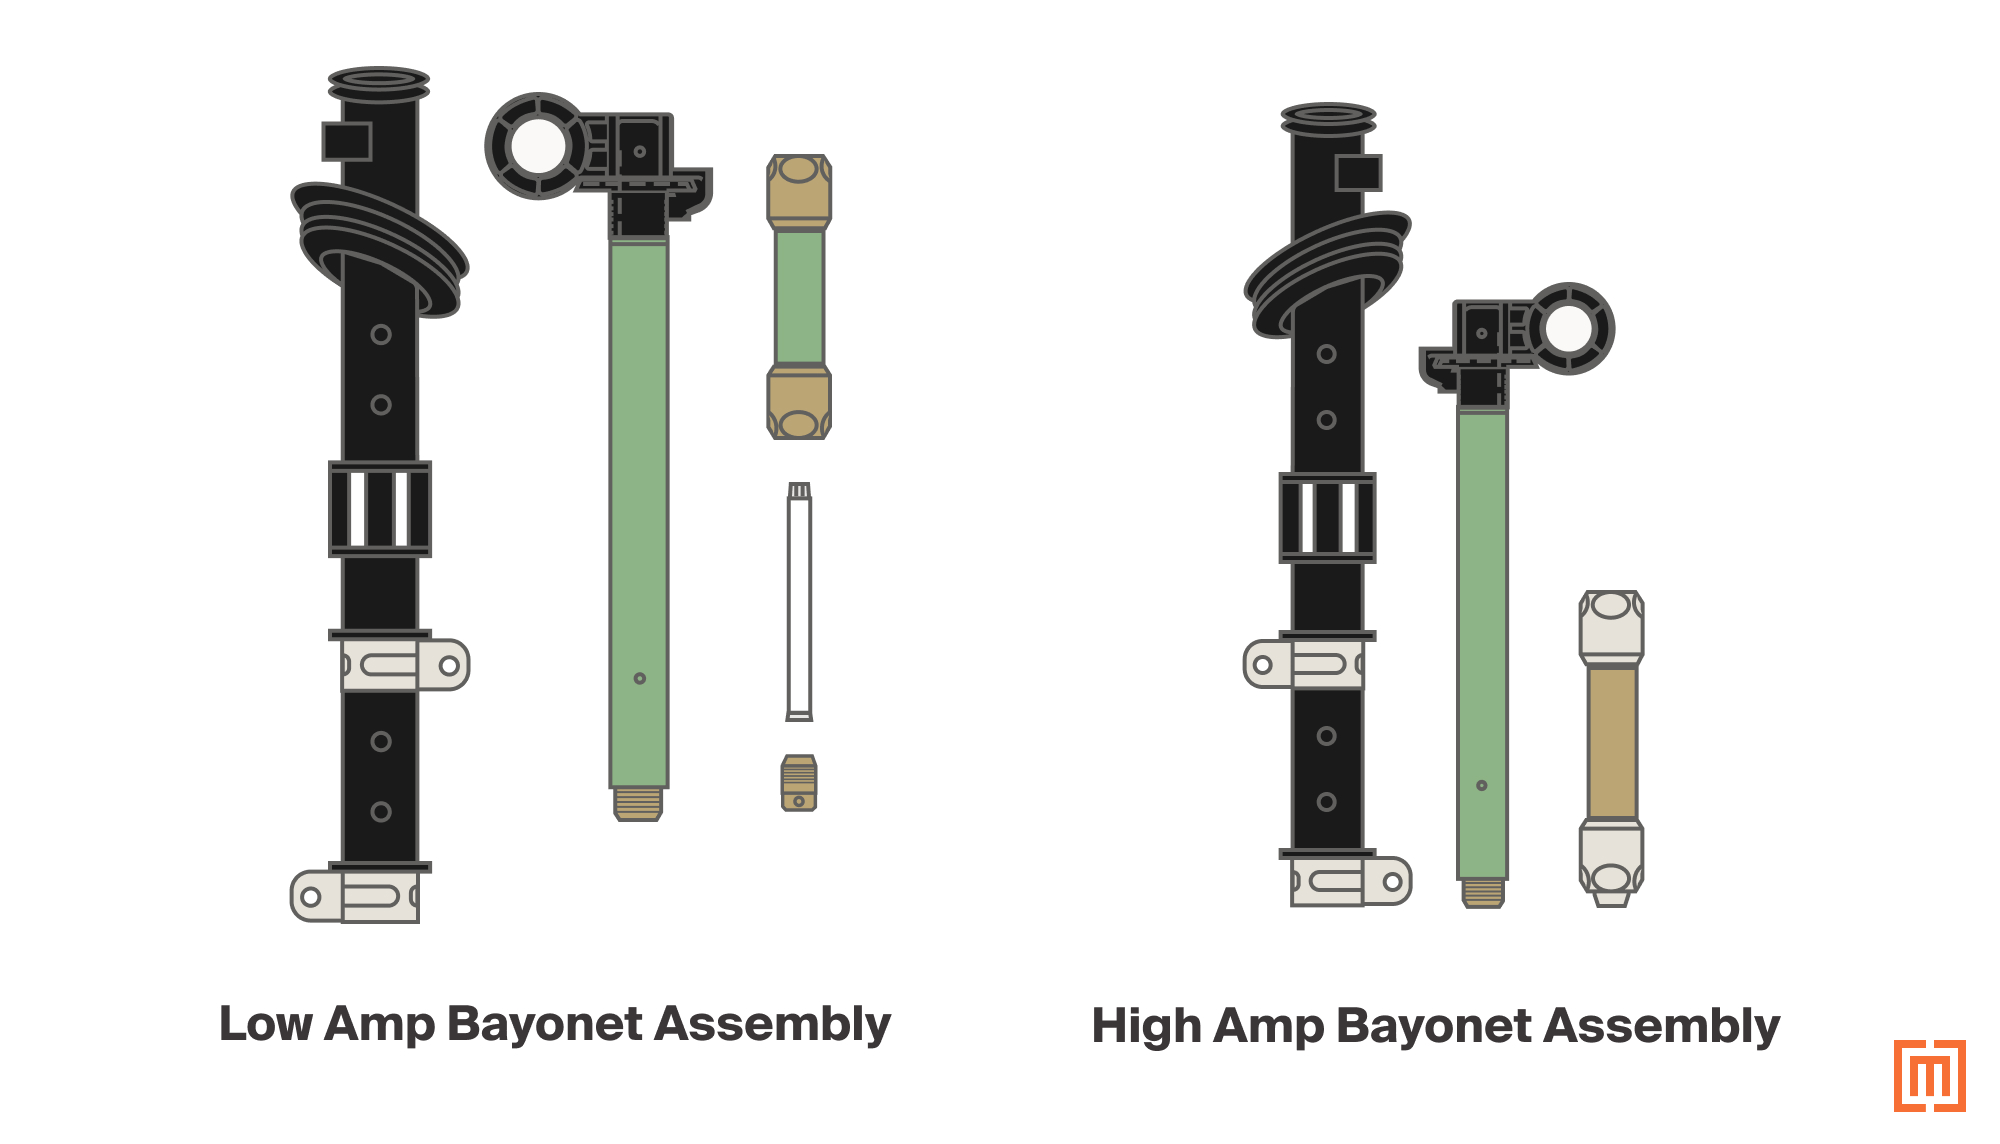
Interconnected Components
Some 38 kV and high-amp overload bayonet fuses are built with the fuse link and cartridge as one interconnected piece. These bayonets do not have separate fuse links and cartridges. In these cases, the entire cartridge must be replaced. If you have one of these fuses you can skip to step 5 below.
Physical Damage or Pitting
If you see any severe erosion or pitting on the brass end pieces, you need to replace the cartridge.
Burn Marks and Blackening
If the interior or exterior insulation material shows signs of blackening, carbon tracking, or burning that is longer than ½” (13 mm), the cartridge needs to be replaced.
If the damage is extremely severe, such as large amounts of melting on the brass or burning that extends for more than half the length of the cartridge, you should replace the entire fuse holder assembly. Not just the cartridge.
Installing the New Fuse Link
Next, grab the new fuse link. Make sure the amps on your replacement fuse exactly match the old one being replaced.
Also, notice that one end of the fuse compartment is slightly wider than the other. You can insert the new fuse link from either end, but it must be oriented correctly: the wider "contact flare" end must sit against the main fuse cartridge holder (the longer tube), and the slotted "tulip tip" end must point outward toward the brass end plug (the cap).
Thread the fuse cartridge onto the longer holder tube before reinstalling the brass cap. This keeps the fuse tight against the brass and helps prevent it from being pushed back out while the cap is tightened.
Tighten the contact-flare end of the fuse against the cartridge holder to 50–70 in-lbs of torque.
Begin threading the end plug back onto the assembly and tighten it to 50–70 in-lbs of torque. Stop halfway through the process, then remove the plug and confirm that the metal tabs have spread uniformly outward, not inward.
After confirming the tabs are spreading outward, apply 50–70 in-lbs of torque to both connections one last time.
A poor connection between the fuse cartridge holder and the end plug can damage both the bayonet fuse and the transformer.
5. Check the Fluid Level.
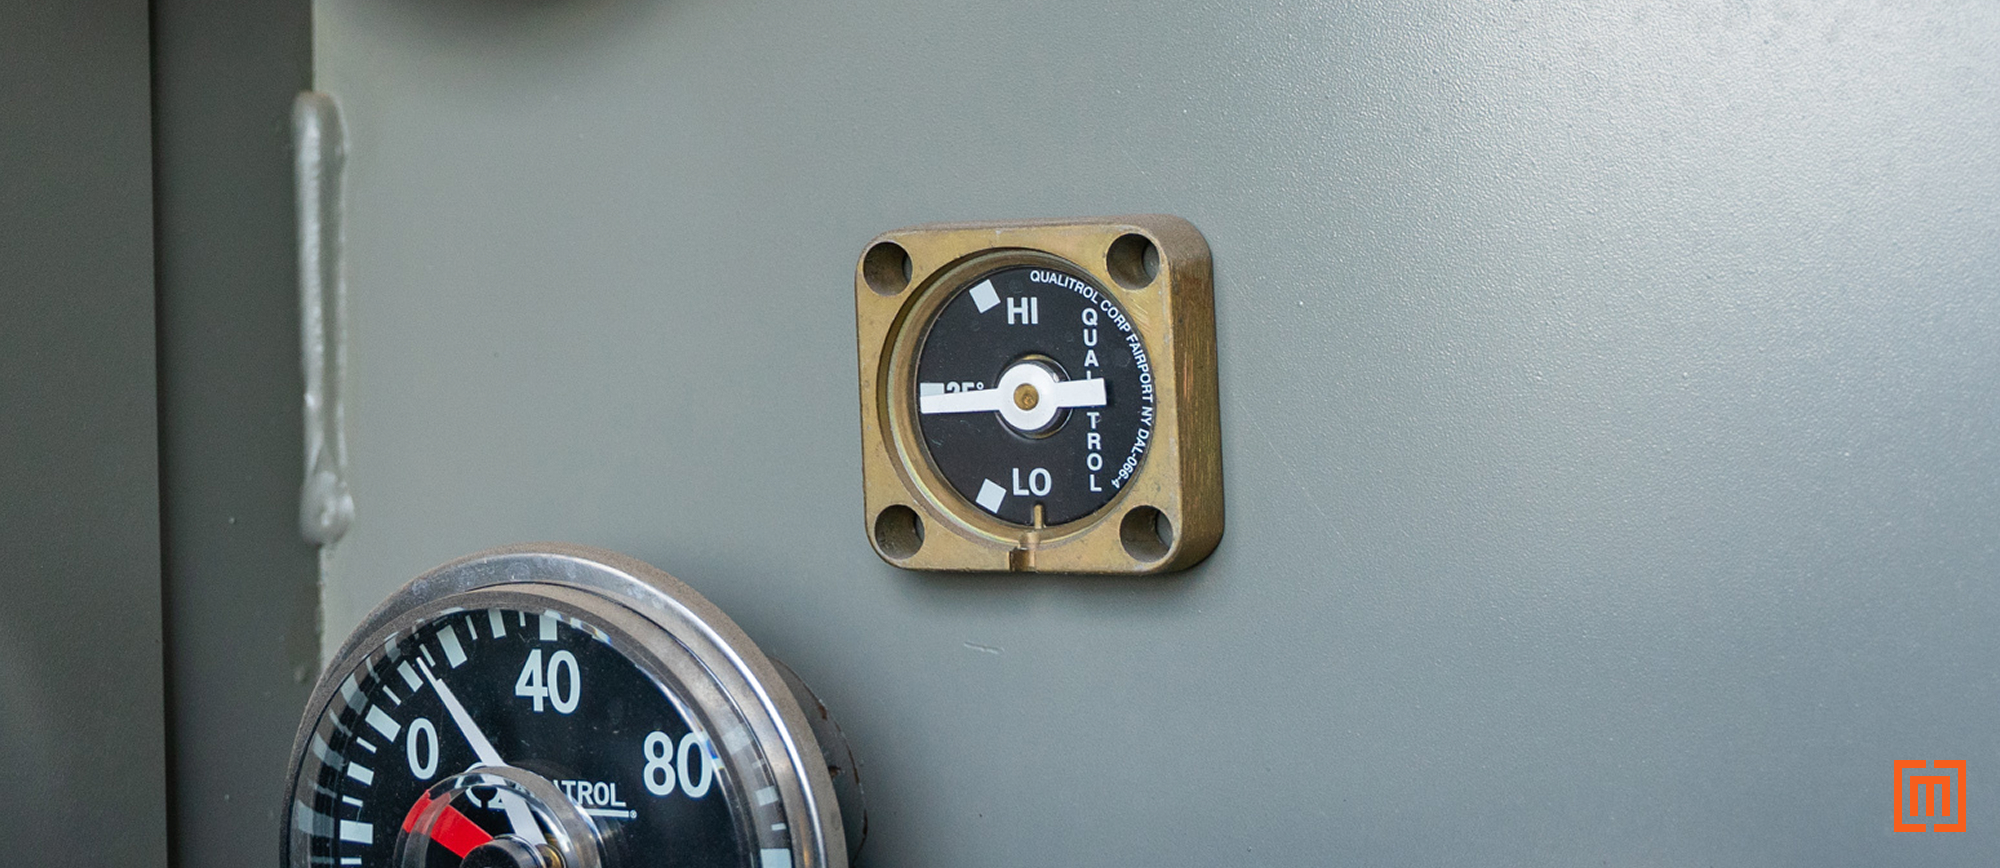
Use the transformer's liquid level gauge to verify that the dielectric fluid is at the correct level. Refer to the specific equipment manufacturer’s instruction book for the proper oil level reading.
The correct fluid level typically sits at the base of the protruding plastic threads of the bayonet holder at 25°C (77°F) assuming the transformer is sitting on a level surface.
6. Reinstall the Fuse Holder.
Before reinstalling the fuse holder, pull the pressure relief valve again until any audible pressure stops. Hold it open for 5 seconds.
Using your hotstick, slowly slide the new fuse assembly into the housing, stopping about halfway to 3/4 of the way in.
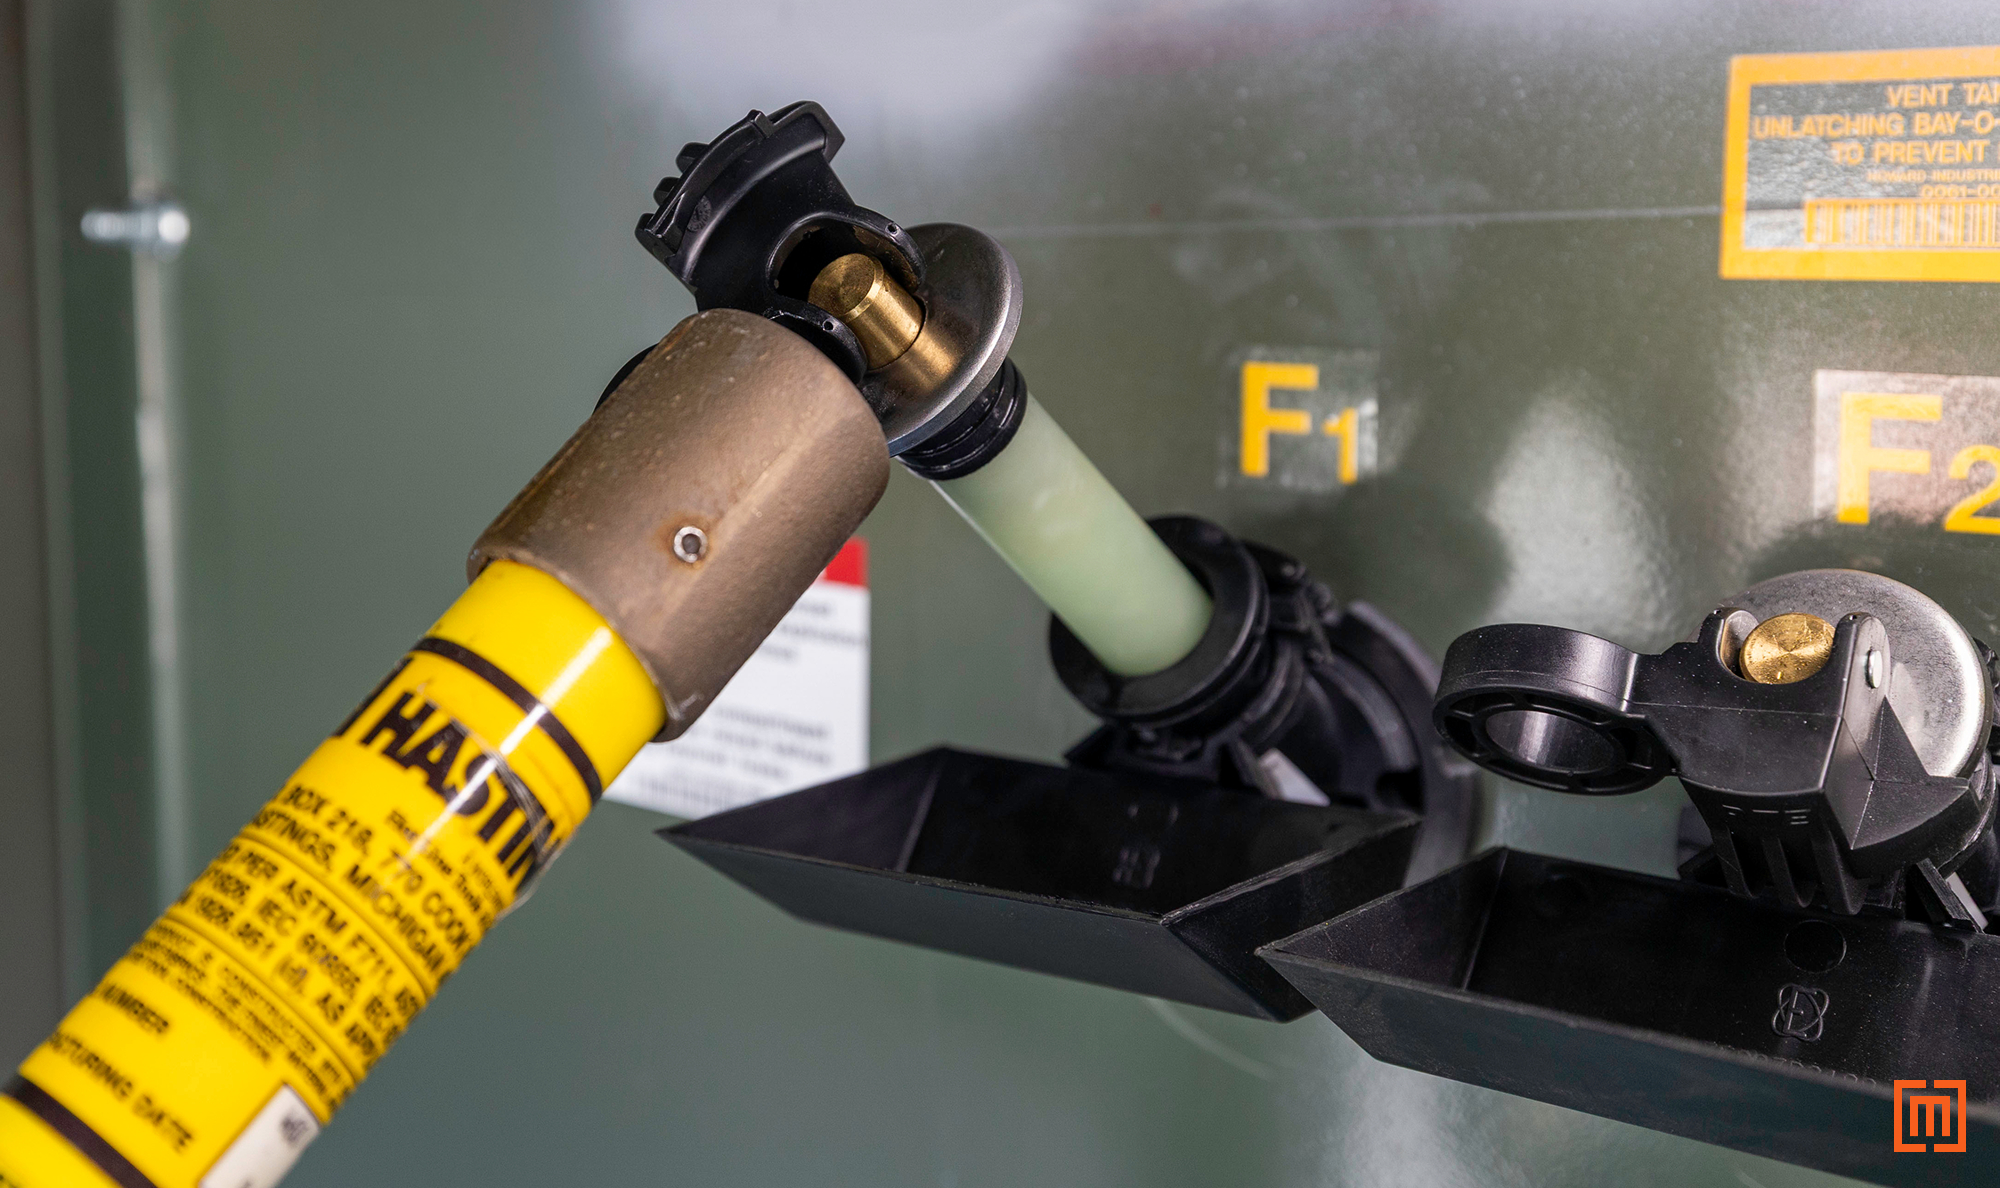
With a firm, rapid motion, insert the fuse the rest of the way. Twist the locking handle to secure the fuse holder and complete the connection.
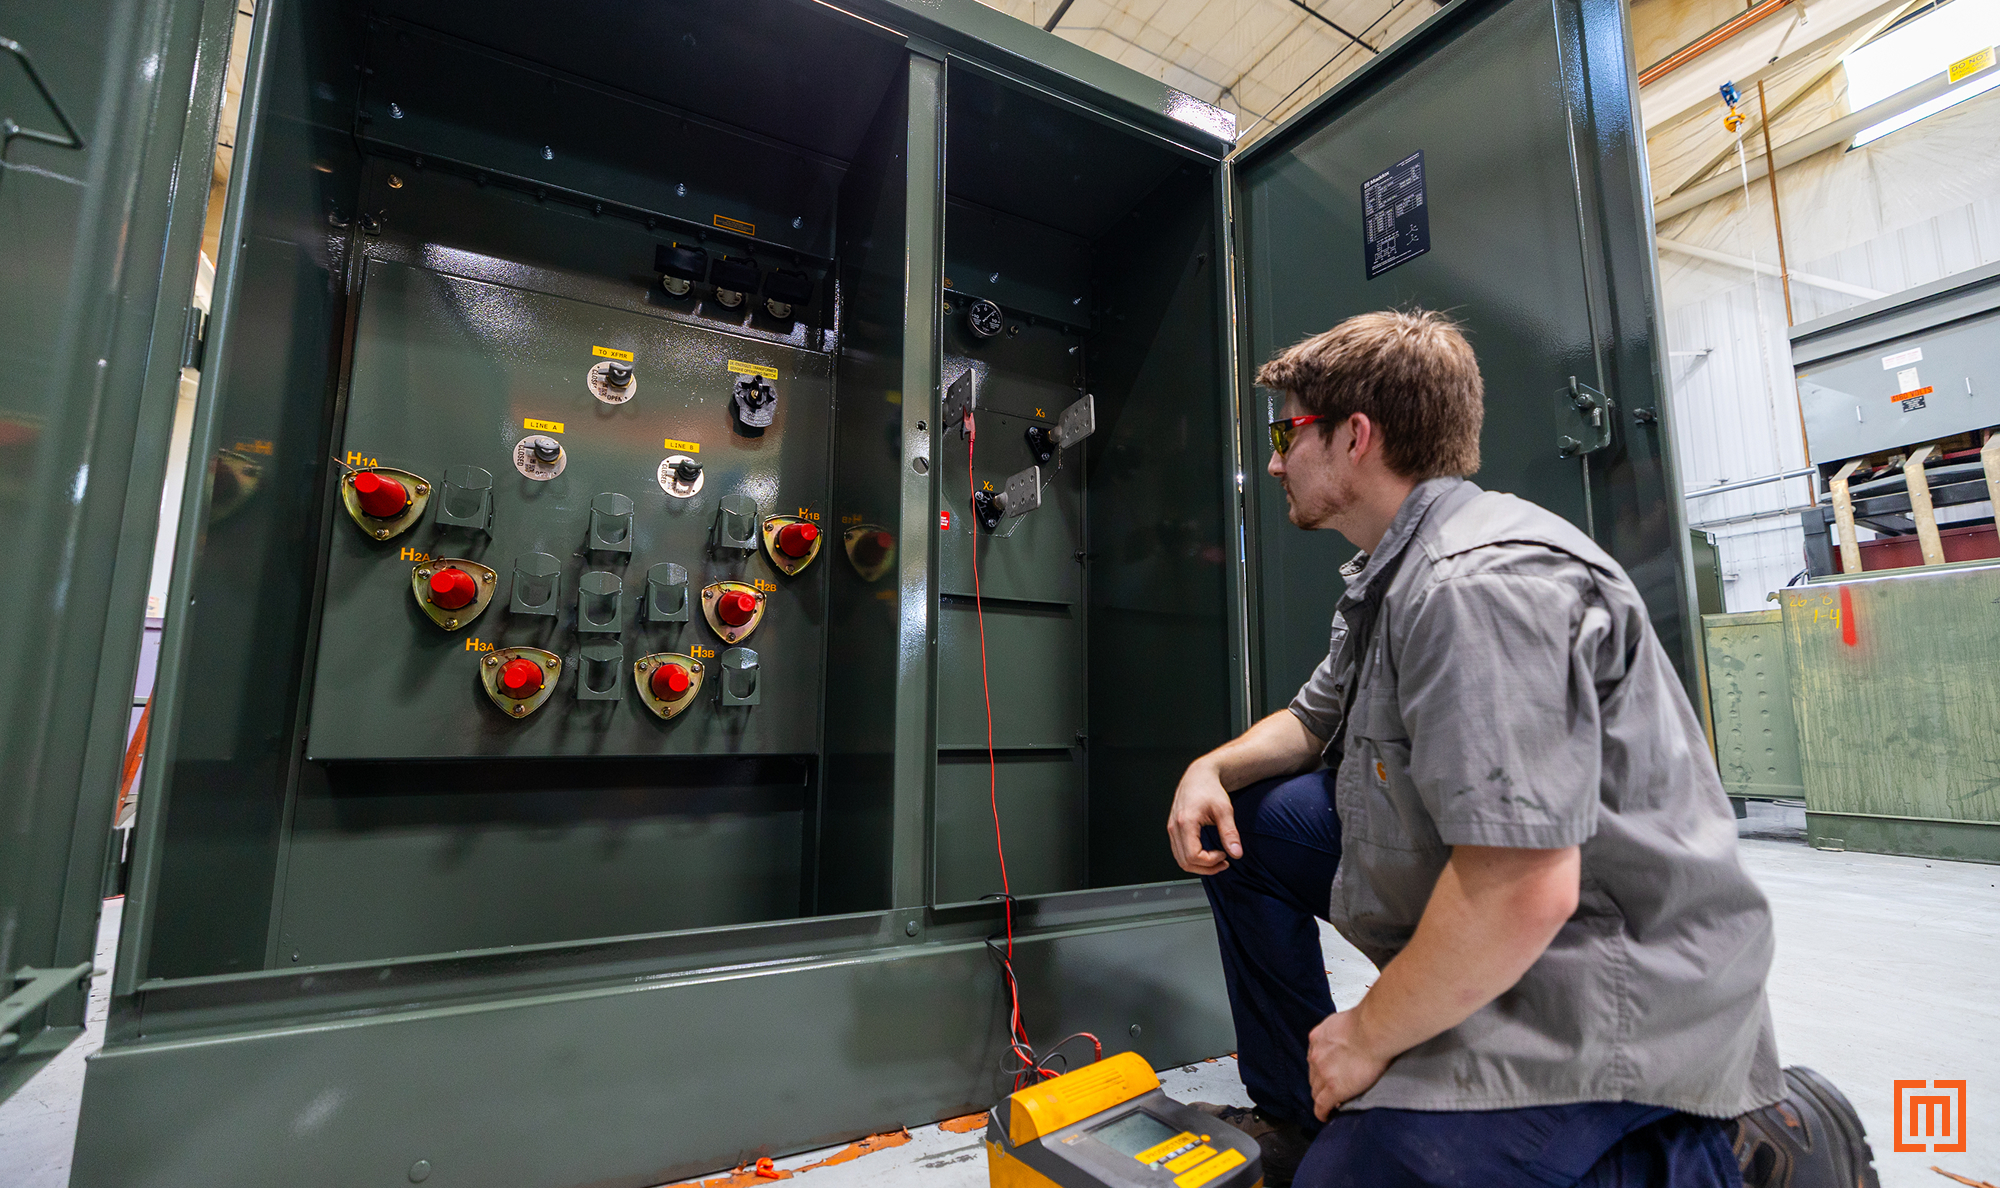
7. Test the transformer.
After replacing the fuses and refilling the pressure, we recommend testing the transformer prior to energizing the circuit. This will ensure all of the connections are secure and the fuses have been appropriately installed.
Need replacement bayonet fuses?
Since bayonet fuses protect your transformer from overcurrents, taking the time to inspect and replace them correctly is important.
If you are looking for replacement bayonet fuse links, cartridges, or other padmount accessories, check out our transformer parts page. We have thousands of transformers and transformer parts in stock at locations across the United States.
We’re here to get your transformer project online.


.jpg)


