
Substation Manual

Substation Manual
Installation, Operation, and Maintenance of Substation Type Transformers
READ THIS SAFETY INFORMATION BEFORE CONTINUING
Read these instructions carefully before attempting to install, operate, or perform maintenance on substation type transformers. This equipment operates voltages that are extremely hazardous. These voltages can cause death, serious injury, inconvenience, and equipment damage. Safe use of the equipment depends on the individual and how they adhere to proper installation, operation, and maintenance procedures.
Personnel should not attempt to service equipment until it has been completely de-energized and all high and low voltage bushing terminals have been properly grounded. Only qualified personnel who are experienced in the installation, operation, and maintenance of high voltage equipment should be allowed to operate this equipment. These individuals are trained in the use of protective equipment (such as rubber gloves, goggles, protective clothing, and hard hats) as well as first aid.
The advice contained in this manual is intended to be a general guide for the installation operation, and maintenance of substation units when operated according to the standards defined in IEEE Standard C57.12.00. Features presented in this manual may not be present in all substation designs. Standard and additional features are subject to change without notice.
Despite efforts to ensure accuracy and completeness, this manual does not consider every conceivable application or circumstance that might occur. Maddox makes no representation of warranty and assumes no responsibility for the completeness, accuracy, sufficiency or usefulness of this manual.
Section 1: Receiving
1.1 Documentation
Upon receiving the unit, locate the substation’s documents. This includes all shipping papers, drawings, manuals, and warranties. Review the transformer's drawings and the nameplate before unloading it. Locate all accessory parts that may have shipped separately. Crosscheck equipment with the bill of lading. The transformer outline drawings will list the location of nameplates and warning labels as well as the units physical dimensions and weight. The nameplate provides electrical and winding information. The wiring diagram provides information on fan and alarm wiring.
1.2 Shipment
Inspect the shipment for any visible signs of damage during transit. Check the packing list against the received items to ensure completeness. Maddox substations typically ship sealed with transformer fluid. However, dielectric fluid, radiators, bushings, and fans can ship separately upon request.
1.3 External Inspection
Perform the following inspection of the delivered equipment before signing any delivery receipts.
- Verify that you have the equipment, accessories, and components listed on the bill of lading.
- Inspect the outside of the unit and ensure there are no signs of external damage.
- Inspect the impact recorder if equipped.
- Ensure the paint finish is not damaged.
- The fittings, conduit, wiring, and other attachments should be tight and undamaged.
- Check for evidence of fluid leakage on the tank, valves, or cooling assemblies.
- Check for damaged bushings.
- Perform a tank pressure test if the unit reads zero on the pressure gauge. Perform a moisture test for units shipped dry. A dew point measurement of the gas in the tank can be a good estimate for insulation dryness.
- Check the shipping crates, packages, or other components shipped separately for damage.
- Ensure the substation's serial number on the nameplate matches with that on the bill of lading.
- Finally, ensure that nameplate specifications align with the given order specifications. This includes kVA, high-voltage rating, low-voltage rating, and impedance.
If the transformer was damaged in transit, contact Maddox as soon as possible.
1.4 Acceptance
Sign the delivery receipt if there is no significant damage. Minor scratches and superficial damage should be on the carrier's freight receipt. Report any significant discrepancies or damages to Maddox immediately.
Section 2: Handling
2.1 Lifting
Use a crane to lift substations. Lifting hooks are provided near the top of the transformer. Attach the lifting slings to designated lifting points. Only lift a transformer from the four attached hooks. Lift transformers in the upright position. Allow no more than 15 degrees of tilt from the vertical orientation.
WARNING: Never loop lifting straps from one lifting hook to another. One strap or chain should be designated to each hook.
2.2 Rigging
Use spreader bars to keep the lifting slings nearly vertical. This will reduce the possibility of tank deformation or damage to the paint. Do not lift the transformer with a forklift as weight stabilization can pose a safety risk.
CAUTION: Take precautions when handling a substation in temperatures below 32 degrees F.
WARNING: Only use provided lifting hooks and spreading bars when unloading a transformer. Do not attach lifting cables to radiators or any other locations on the equipment.
2.3 Unloading
Check the following components before you unload the equipment from the truck:
- If the shipment is not complete, contact Maddox and make an incomplete shipment claim in a timely manner. This will prevent the voiding of future claims.
- The tank pressure gauge must show a positive or negative pressure when received. Over time, a rising or falling pressure assures the recipient that the tank is sealed. If the pressure gauge shows a consistent zero pressure reading, then the tank may have a “leak.” If this is the case, check the tank and pressure valves immediately for oil leaks.
- Check for any damage to the equipment’s paint. Use touchup paint to amend the damage. Be sure not to paint over any labels or name plates when applying the touchup paint.
- Do not remove any labels or stickers.
- Perform one final check for missing parts before storing the transformer.
2.4 Dielectric Fluid Level Check
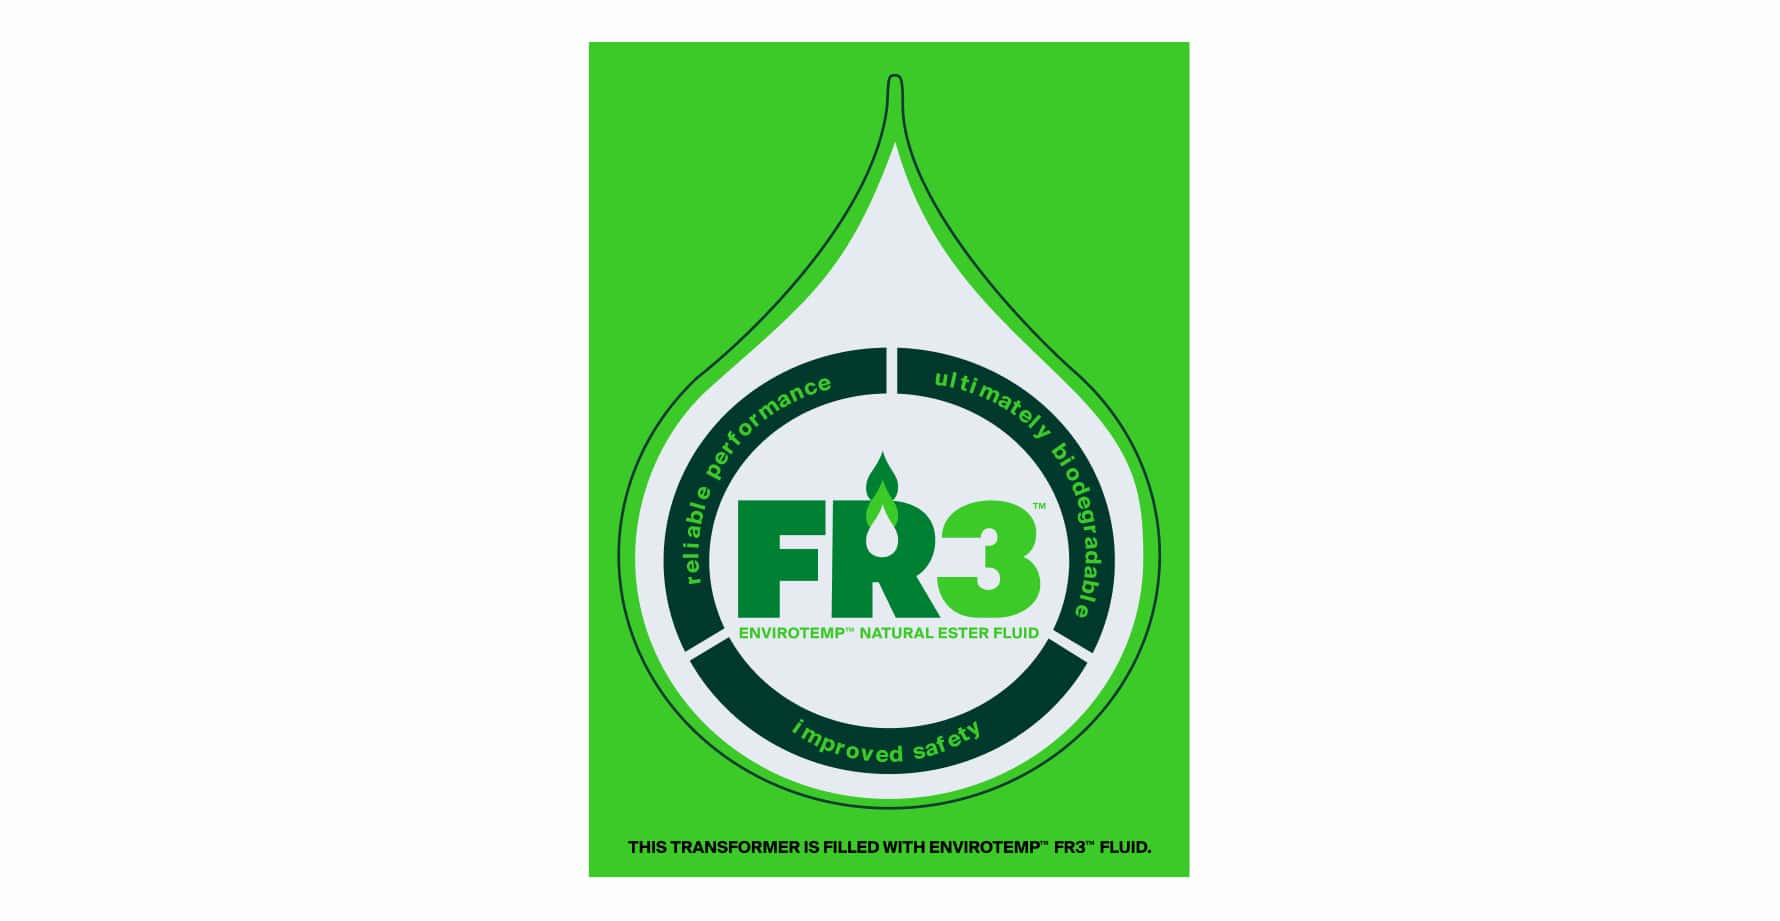
Substations arrive filled with either FR3 or mineral oil. Before energization, make sure the liquid level indicator displays the proper oil level. At approximately 25°C, the correct fluid level is at the liquid-level plug.
WARNING: Never remove the oil level plug when the transformer is above 40 degrees Celsius.
CAUTION: If this sticker is on your substation, only fill the unit with FR3 fluid to the appropriate level.
2.5 Internal Inspection
Opening a substation will nullify the transformer’s warranty. Do not perform an internal inspection on a unit without first contacting Maddox’s warranty department and receiving approval. If you suspect internal damage upon receiving a unit, note and photograph all evidence of external damage on your substation. Note any external damage to your unit on the bill of lading as well. Finally, contact Maddox’s warranty department for more information and advice.
WARNING: Contact Maddox before opening a unit or repairing an externally damaged substation. Replacing bushings or opening a substation without written consent from Maddox will nullify the unit’s warranty.
Section 3: Storage
3.1 Storage for 90 Days or Less
Store liquid-filled transformers with dielectric fluid to prevent contamination or absorption of moisture. Store substations in a clean, dry, and secure location. The storage facility should not have radical temperature changes. The foundation must be able to bear the weight of the transformer. Check the insulating fluid for dielectric strength. Test the unit's insulation by performing a megger test and check the coil ratios at each tap position to ensure the de-energized tap changer works. Omit these last two tests if the bushings are not attached to the substation. Measure and record ambient air temperature every time you inspect the unit.
CAUTION:
Never store a transformer on jacks or temporary blocking.
Never store the transformer on rollers.
Never store a substation near areas of high moisture, salt levels, or corrosive gasses in the air.
3.2 Storage for Over 90 Days
Follow the same guidelines as short-term storage. In addition to this, conduct periodic inspections to ensure the equipment remains in good condition. Maddox ships liquid-filled transformers with a dry nitrogen blanket. Some units are equipped with a nitrogen blanket through a regulated bottle of dry nitrogen. Use desiccant packets to absorb moisture in air-filled compartments. This includes control cabinets and air terminal chambers. Check and replace these packets during regular maintenance intervals.
3.3 Removal of Radiators
If shipped with detached radiators, store them in a clean, dry place. Radiator openings are shipped with temporary protective caps. Ensure these protective caps are sealed before storage.
CAUTION: Never store radiator assemblies on the ground or where they can get wet.
3.4 Quarterly Inspection
Inspect the substation using the list below after the first month of storage and every quarter after.
- Inspect protective coverings on bushings. Replace coverings if they are damaged.
- Inspect space heaters if you use them. Inspect desiccant packets if in use. Replace them if necessary.
- Record fluid-level and pressure/vacuum readings.
- Measure and record ambient air temperature.
- Any transformer oil totes in storage should be visually inspected.
Section 4: Installation
4.1 Pre-service Inspection
WARNING: Never try to change connections on an energized transformer. Only technicians familiar with the standards for installing, operating, and maintaining transformers should be permitted to work on a de-energized substation.
Thoroughly inspect new transformers and transformers coming out of storage before energizing them. Inspect a transformer's exterior for any superficial scratches, nicks, or dents. Inspect all gaskets and seals servicing bushings, gauges, fuses, and other operating devices for dielectric fluid leaks. Repair or replace any defective gaskets before energizing the transformer.
Ensure that the transformer is filled with enough dielectric fluid. Reference the liquid level gauge for this step. Finally, conduct basic electrical tests if the transformer was stored for longer than 90 days. This includes an insulation test and turns ratio test. Crosscheck the results from these tests with the results from the original factory testing. Check out this article for more information on transformer testing standards.
4.2 Jack and Skid
Use a jack and skids to move the equipment into place. The foundation must be able to receive the substation before you move the equipment. Only use the jacking pads provided on the tank. Do not use radiators or any other part of the transformer. Jacking the transformer incorrectly may lead to permanent and debilitating damage. When transporting a transformer, use enough rollers to equally divide the weight. Ensure that the roller's size can support the weight of the substation before moving it.
4.3 Foundation
Ensure your foundation can support the weight and dimensions of the incoming substation. When installed, the transformer must sit horizontal to the pad's base. There should be no gaps between the substation and its pad.
The transformer must be installed such that it is not tilted more than 4 degrees. An excess of 4 degrees of tilt can cause dielectric failure and compromise the transformer. It can also affect the cooling system and lead to overheating. Ensure transformer components such as fuses, switches, core, and coils are immersed in dielectric fluid. After installation, there must be at least 2 feet of clearance around the perimeter of the transformer.
4.4 Grounding
Make sure there is an adequate connection on the transformer tank to ground the unit. Make sure that a proper low-impedance ground connection is established.
WARNING: Implement the proper low-impedance ground. Transformers must be grounded in accordance with local and national standards.
4.5 High Voltage Bushings
Before making any connection, identify whether you have received an eyebolt or spade conductor. Make sure that the mating surfaces are free of any form of debris. This includes burrs, dirt, and dust. These bushings are made out of porcelain and have terminals or studs suitable for connecting aluminum and copper cables. Carefully make high-voltage connections without overburdening the bushing.
WARNING: Do not overstress bushings when making connections. Damaged bushings can lead to property damage, personal injury, or death.
CAUTION: Avoid excessive cantilever stress from attaching heavy cables to high or low-voltage bus bars.
4.6 Low Voltage Bushings
In most cases, substation units will be equipped with spade terminals. Connect cables to the bottom of these bushings. This will decrease the cantilever stress from damaging the bushing. If shipped separately, follow the manufacturer's guidelines for bushing installation.
4.7 Dielectric Fluid
The transformer can be filled with FR3® or mineral oil depending on the customer's specifications. Once filled, the unit is pressurized according to the required specifications and prepared to ship to the customer.
4.8 Transformer Pressure
A transformer’s internal pressure can vary after delivery due to atmospheric pressure. Only when a transformer is significantly overpressurized should you depressurize the unit. The transformer can be pressurized with a dry nitrogen bottle up to +1.0 PSIG when the oil temperature is approximately 25°C.
CAUTION: Oil level will decrease ½ inch for every 10 degree C drop in temperature. This can create a slight vacuum in the chamber. This should not be a cause for concern.
WARNING: DO NOT let the tank pressure exceed a vacuum of 3 PSIG or a volume of 5 PSIG. The tank will begin to distort at a pressure of 7 PSIG.
WARNING: DO NOT add nitrogen to a cold transformer. This can lead to an over pressurized transformer.
When venting the transformer pressure, open the pressure relief valve. Only vent a transformer when the oil temperature is approximately 25° Celsius. Once you depressurize the transformer, let go of the pressure valve such that it will sit again on the seal. At a later time, check the quality of the oil after re-pressurizing the transformer. A DGA oil test is a good way to do this.
WARNING: DO NOT take an oil sample when a substation's pressure is below 0 PSI.
Section 5: Energization Tests
The following tests should be performed at a minimum before the substation is energized. Do not energize a substation before performing these tests and ensuring the unit meets the minimum requirements.
WARNING: DO NOT energize a transformer without cleaning its bushings.
CAUTION: DO NOT energize a transformer without the pre-energization inspection and tests completed.
5.1 Pre-energization
After performing a ratio and insulation resistance test, ensure that the following components are in the correct position and secured:
5.1.1 Tap Changers
Verify that tap changers are set to the right voltage before energization. The set screw should be tight and secure.
5.1.2 Grounding
Ensure the transformer frame is permanently grounded with a sufficient low impedance ground.
5.1.3 Insulating Fluid
Draw a sample and test the strength of the unit's dielectric fluid. New fluid should have a dielectric strength of 30 kV or greater. Verify that the transformer is filled with enough dielectric fluid. Check the fluid temperature gauge and make sure the temperature is not lower than minus 20 degrees C.
5.1.4 Bolted Connections
Make sure that all bolted connections are torqued properly.
5.1.5 Terminals
Ensure that all bushing terminals are clean before energizing the transformer. Any bit of dirt or dust can disrupt the flow of electricity.
5.1.6 External Tank Inspection
Perform a final external inspection around the tank. Make sure the transformer is properly mounted and secured. Close the transformer door at this time and install a tamper resistant protection cover.
5.1.7 Radiator Valves
If your transformer has detachable radiators, make sure that the valves are open before energizing the transformer.
WARNING: Check all radiator valves before energizing your transformer. All valves (top and bottom) must be open. Leaving valves closed will lead to your transformer overheating.
5.2 Post-energization
After energizing your transformer, ensure the following components are functioning properly:
5.2.1 Voltage Verification
Double check the secondary voltage output before you load the transformer. This can be done with a voltmeter. Cross check your results from the test with the voltage indicated on the transformer’s nameplate.
5.2.2 Leaks
Walk around the transformer and examine it for leaks. If you find a leak, de-energize the transformer and address it immediately.
5.2.3 Operation
Verify that the transformer operates effectively. The transformer will produce a humming noise while under load. If you notice excessive noise, vibrations, or heat coming from your transformer, de-energize the unit immediately.
5.2.4 Gauges
Make sure the liquid level gauge and oil temperature gauge are both within operating limits while the transformer is under load.
Section 6: De-energized Tap Changers and Switches
A de-energized tap changer is a rotating knob or handle that can be used to adjust the voltage ratio of a transformer. A series/multiple, Delta/wye, and load break switch are used for de-energizing operations. Never operate a tap changer, multi-voltage switches or delta/wye switches while a transformer is energized. Consider this article for more information on tap changers and voltage adjustment taps.
6.1 Tap Changer
To operate, loosen the lock screw enough for you to pull out the handle. Use a hotstick to rotate the handle until you arrive at the voltage ratio you desire. Push in the handle and tighten the lock screw to secure your new voltage.
For a linear tap changer with a handle, pull the handle straight out and turn until you arrive at your desired voltage. You can also equip this device with a padlock to prevent tampering. Never operate a tap changer while the transformer is energized.
6.2 Dual Voltage and Delta/Wye Switch
Some substations can be equipped with a dual voltage or delta/wye switches; this will be indicated on the nameplate of the transformer. Both switches are designed for de-energized operation only. Follow any switch operating procedures indicated on the transformer’s nameplate.
To operate a rotary type switch, release the locking bolt and pull the switch straight back. Turn the switch 90 degrees until you achieve the new desired voltage. Tighten the set screw to secure the new position. For a linear type switch, release the locking notch and pull the switch straight back. Turn the knob to the desired voltage and let it fall back into place.
WARNING: DO NOT operate a switch on an energized transformer.
6.3 Load Break Switch
Check and see what type of load break switch your transformer is equipped with. This can be a single two-position switch, a single four or three-position sectionalizing switch, or multiple two-position switches. You can use each one of these switches to break a load and de-energize a transformer. Switches with multiple positions (or multiple switches) can be used to de-energize parts of transformers depending on the customer's needs.
Section 7: Components and Accessories
This section describes the various accessories your transformer can be equipped with. Some accessories listed here are optional and not listed in your equipment’s instruction manual. Certain optional accessories are provided due to compliance with National Standards as well as to the IEEE Standard C57.12.34.
7.1 Transformer Nameplate
The nameplate provides physical and electrical information for the substation.
7.2 Liquid Temperature Gauge
The liquid temperature gauge provides the temperature of a unit's dielectric fluid. Oil Temperature readings vary with load and air temperature. This gauge contains a resettable maximum temperature indicator. This allows you to check that the unit is not operated above its insulation rating. These gauges can be equipped with switch contacts.
7.3 Pressure Vacuum Gauge
The pressure vacuum gauge indicates internal tank pressure relative to the atmospheric pressure. The gauge dial adjusts itself as the oil warms and cools inside the tank. Ideal tank pressure during normal operation is between 2 and 5 psi. You can add alarm contacts to this gauge for remote inspection of the transformer's pressure.
WARNING: If the pressure/vacuum gauge constantly reads zero under different loads and temperatures, the transformer should be de-energized and checked for a possible tank leak.
7.4 Liquid Level Gauge
The liquid level gauge monitors the dielectric fluid level in the transformer tanks. The fluid must stay at the right level (25 degrees C) for substation operation. If the gauge indicates a low level of fluid, the transformer must be de-energized and inspected to determine the cause. Low dielectric fluid levels can lead to irreparable damage to equipment. You can also add alarm contacts to this gauge.
7.5 Pressure Relief Device
The Pressure Relief Device (PRD) provides protection against the build up of large volumes of internal tank pressure. It consists of a self-resealing, spring-loaded valve. The PRD can include a resettable visual indicator to show that the valve is activated. Typically, PRDs are attached to the cover of the transformer tank. Most PRDs are only found on 1000 kVA or larger units. They can be included on smaller units at the customer’s request.
Most substations will have a small pressure relief valve on its side. The device looks like a small nozzle attached to the side of the unit. It releases pressure when a transformer becomes over-pressurized. The device will automatically reseal when the transformer pressure has returned to normal. You can manually relieve pressure with this device.
7.6 Winding Temperature Gauge
This gauge displays the estimated winding hot-spot temperature. The system uses a probe to measure the heat of the transformer fluid plus the additional heat produced by a thermowell. The gauge has a resettable drag-hand pointer that indicates the maximum temperature reached since it was reset. This system allows for a technician to monitor and measure winding heat without interrupting efficiency.
7.7 Internal Fault Detector
An Internal Fault Detector (IFD) monitors a transformer’s windings for internal arcing. When it detects a fault, the sensor releases a visible signal to inform a technician. The IFD can also function as a pressure relief valve. A qualified technician can pull the ring on an IFD to release pressure.
7.8 Drain Valve and Sampling Device
This valve is located at the base of the transformer’s tank. You can use the valve for draining dielectric fluid from the substation. Technicians should use the drain valve to take a DGA test without contaminating the oil. Contaminated oil can produce a false reading during the test.
7.9 Rapid Rise Relay
Your unit may have a rapid pressure rise relay (RPRR). This device will detect and adjust for dangerous changes in a transformer’s pressure. You can use the device as an alarm signal to minimize the possibility of transformer damage. You can change this device to provide a continuous alarm instead of a momentary contact signal when the device is tripped.
7.10 Fans
Install and test fans to ensure proper cooling of the equipment. Transformers rated for a higher kVA often have fans to help cool the transformer during times of peak load.
7.11 Detachable Radiators
If your substation is shipped with detachable radiators, attach them and make sure they function properly. Follow the instructions below to install the radiators:
7.11.1 Mounting
1. Check each radiator carefully. Remove any blind flanges and clean gasket surfaces.
2. Make sure the gasket surface of each throttle valve is clean and closed.
3. Mount the radiators to the tank one at a time.
4. Always use new gaskets. Use a small amount of epoxy or another sealing compound on gaskets to reduce the risk of leaks. Be sure to tighten all throttle valves and inspect them after 24 hours.
5. If provided, mount stiffener bars between radiators.
6. If provided, install fans and connect the power control cables.
7.11.2 Filling
Once you have attached the radiators, fill each one with dielectric fluid. Read the instructions that follow:
1. Release any air through the air vent screw at the top of the radiator.
2. Partially open the lower throttle valve located on the tank.
3. Once the oil begins to escape from the air vent screw, close the air-vent screw quickly.
4. Finally, open the upper and lower throttle valve.
7.11.3 Removal
Drain radiators prior to removal following the procedure below:
1. Prior to draining the radiators, close both top and bottom throttle valves.
2. Unscrew the protection cover of the drain plug and ensure the air vent is closed.
3. Unscrew the drain plug. Connect a flexible hose to the drain plug to avoid spilling oil.
4. When the oil flow stops, remove the protection cover.
5. Open the air vent further by turning the screw in a counterclockwise direction. This will negate the vacuum and push the rest of the oil out.
6. After draining, close the vent and drain plug and attach their covers.
CAUTION: Where units are shipped with bolted radiators already installed, throttle valves are closed for shipping. Ensure all throttle valves are opened prior to energization.
WARNING: Ensure that all fans can spin freely before powering them.
Section 8: Maintenance
A responsible owner will inspect, maintain and keep the transformer in operating conditions. Any unit failures should be addressed immediately. Look through the following steps to learn more about substation maintenance.
WARNING: Replacing substation parts or opening the tank will void a unit’s warranty. Contact Maddox’s warranties department for questions about performing maintenance or maintaining a unit’s warranty.
WARNING: The transformer must be de-energized before performing maintenance work. Failure to do this could result in severe property damage, personal injury, or death.
8.1 Periodic Tests and Inspections
The following tests and inspections are recommended for maintaining a substation.
8.1.1 Gauge Readings
Measure and record gauge readings, ambient temperature, and transformer load one month after energization and then annually thereafter.
8.1.2 Control Wiring
Make sure the control wiring insulation is in good condition. Ensure the weather seals are intact. Compare the control power supply’s voltage to the voltage stated on the wiring diagram. Perform these inspections annually.
8.1.3 Paint
Annually inspect the transformer's paint finish for weather and rust. Repair any paint damage you find.
8.1.4 Bushing Insulators
Inspect your unit's bushing and surge arrester insulators annually. If the surfaces are dirty, clean them off when the transformer is not energized.
8.2 Bushing Maintenance
Check and make sure your substation bushings are clean and do not show signs of wear or rust. Check for oil leaks towards the bottom of where the bushing meets the transformer wall. Bushing gaskets must be free from gas or oil leaks. If a bushing looks like it may need to be replaced, contact Maddox for advice.
WARNING: Replacing substation bushings without prior authorization will void the unit’s warranty.
CAUTION: Always vent a transformer before replacing its bushings.
CAUTION: Only perform maintenance on a transformer if it has been de-energized.
8.3 Sampling Insulating Fluid
Periodically check the transformer's fluid level by inspecting the fluid level gauge. Sample the insulating fluid annually. Samples should be drawn from the oil sampling valve at the bottom of the tank.
Section 9: Figures
Items that should be illustrated in figures.
1. Radiators check
2. Bushings check
3. Tap changers
4. Nameplate
5. Pressure relief device
7. Liquid level gauge
8. Pressure vacuum gauge
9. Liquid temperature gauge
10. Oil drain valve
11. Substation lifting hooks
12. Rapid rise relay
-min.jpg)
Conclusion
We hope you found this manual helpful. At Maddox, we have thousands of transformers in stock and ready to ship. If you need a substation or some other transformer for your next project, contact us today to speak to one of our sales representatives.


